Wednesday, May 16, 2012

Honeydew Ice


"Women, melons, and cheese should be chosen by weight."

-Spanish Proverb

Goodness it's been hot here! These 80 degrees F. (27 degrees C.) days are getting to me.

I saw these loose recipe cards in a free pile at a church sale and I rescued them.


I'm glad I did, because this really hits the spot on a warm day. Not exactly a recipe, more of an idea, or a reminder. "Hey remember that you can blend fruit, add sugar and freeze and it will be delicious?" "Oh, right, I forgot, thanks for the reminder." That's sort of the conversation I had in my mind about this.


Perhaps this is as much as a recipe as Paula Deen's English Peas. There is much controversy (and humor) about the simple recipe. For me and my honeydew ice, I'll risk the mocking


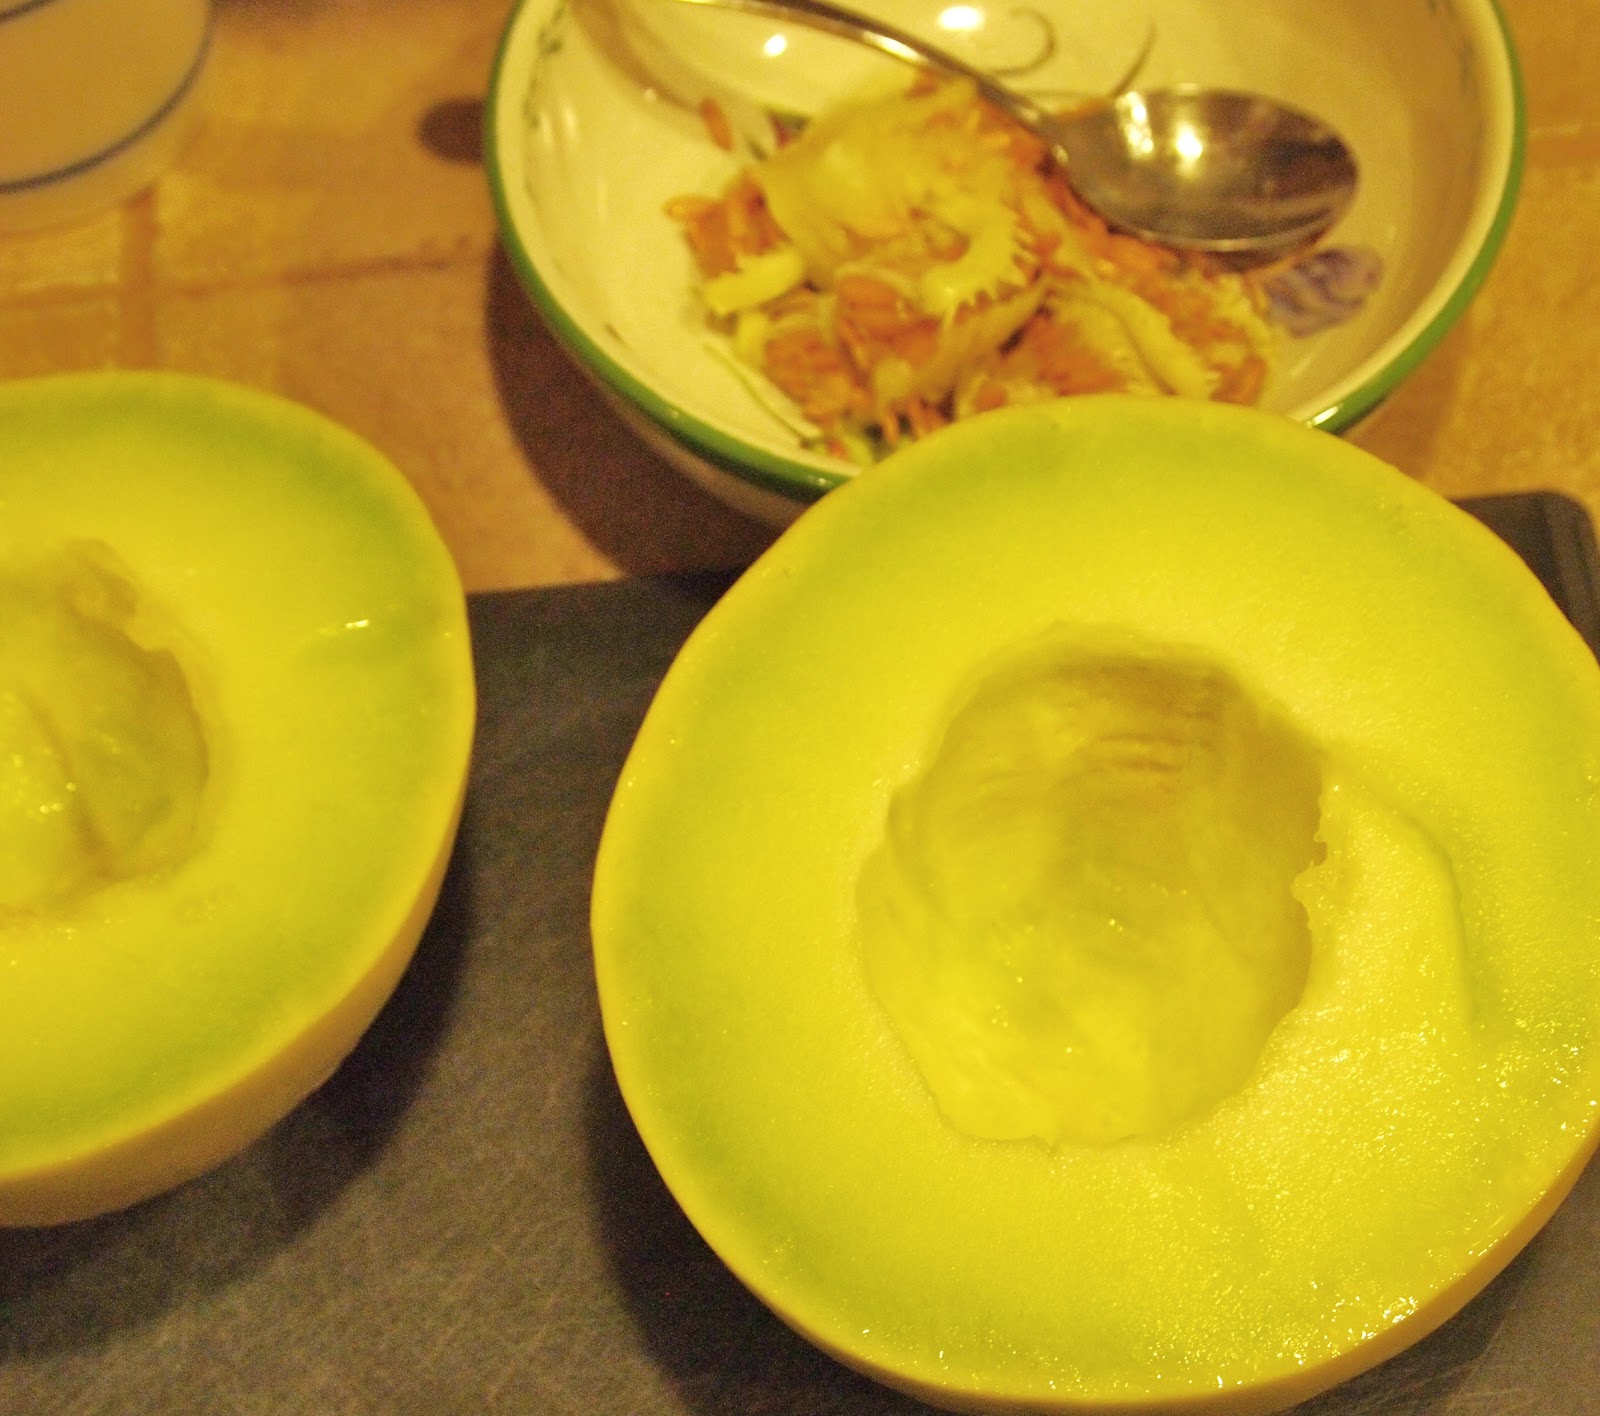
Cutting up the honeydew


Call it ice, call it granita, no matter. It's a great idea for any fruit on a hot day. Especially since it's so easy. The last thing anyone wants to do in the heat is cook, or do any work for that matter.

Blending it up to a puree


I like to relax in the heat with something frozen and cold.


Pour in a shallow dish

A little alcohol involved doesn't hurt either. Imagine a shot of Midori Melon liqueur poured over this, man my mouth is just watering thinking about it. (I would indulge my craving, but alas, no Midori in the house.)


Wait an hour, scrape it up while it's still in the freezer

Or some Sprite can be poured over for a delicious slushy-ish concoction.


Wait a little longer, scrape it up some more and it's ready!


However you eat this, plain or with accoutrement's it's absolutely perfect on a hot day.


A great new book I bought for quotes from the kitchen

The quote about melons at the top of this post is from this book I recently purchased called A Commonplace Book of Cookery: A Collection of Proverbs, Anecdotes, Opinions and Obscure Facts on Food, Drink, Cooks, Cooking, Dining, Diners & Dieters, dating from ancient times to the present. It's a fantastic book filled with great food quotes, which I love since I start each of my posts with a quote. I'm really loving this book.


Quilted bowls with Fleur De lis and flower details are available at my Etsy Shop, House Of Lucien.


I'm still adding items to my Etsy shop. It was my plan to get the banner up at my shop, finish those type of details then announce it here and say something like, "O.K.! It's perfect! Everyone go look at my shiny new Etsy Shop! Maybe that day will come, but for now I'm still working on it. By the time I'm done I'll have well over 100 items and I'll have a beautiful banner. But I still invite you to visit. I am really proud of the items I offer, they are wonderful vintage housewares. I do free gift wrapping with fabulous ribbon, (I actually enjoy gift wrapping and I sort of collect beautiful ribbon.) And I'm happy to enclose a message from the sender to the recipient. I make it easy to send a gift to someone you love. (Or don't love, that's o.k. too.)


Honeydew Ice

This can be made with any fruit, really. Recently I've done this with strawberries (I strain it to remove the seeds after blended,) papaya (with lots of lime juice) cantelope and pineapple.  basically if I have fruit in the fridge, I blend it and freeze it in this manner. I just taste it after blending and add sweetner to taste.


Ingredients

One honeydew melon- seeds removed and cubed

1/3- 2/3 rds a cup (80 ml - 160 ml) of Honey - or you can use sugar if you prefer- the amount will be determined by your taste as well as how sweet your fruit is.

Juice of one lime

Shots of Midori Melon liqueur- Optional

Sprite- Optional

Directions

Blend the honeydew melon cubes in a blender till it's very pureed, a few minutes. Add the lime juice and honey (or sugar) (start with the lesser amount, then taste it and see if it's sweet enough for your taste, if not add more till it's as sweet as you like,) Blend well again.

Pour into a shallow container (I used a 9x13 pan) and place in the freezer.

After about an hour in the freezer, scrape it with a fork. 30 minutes later scrape it again. Keep scraping at 30 minute intervals until it's as frozen as you want it. Scoop it up in bowls and serve.

Alternately, scoop it up into wine glasses or another type of glass and pour either a shot of Midori, melon liqueur (or whatever kind of liqueur you choose)  over it, or you can pour sprite over it for a sophisticated kind of slushy.

If it gets too hard in the freezer, just set it out on the counter to thaw for 10 minutes or until it's soft enough to scoop.

Tuesday, May 8, 2012

Breakfast Apple Pie


"If you wish to make an apple pie from scratch you must first invent the universe."

- Carl Sagan


It's 7 o'clock at night and there's nothing to eat! I thought. I needed ideas. I wanted something different. I had been craving fruit, but the only fresh fruit in the house was a few lone apples, almost past their prime.


chopping the walnuts

Luckily I picked up this peculiar cookbook from the 80's entitled, "Where's Mom Now That I Need Her- Surviving Away From Home." It was still sitting on the counter, not yet put away in it's place on the shelf, since I had just purchased it a few days earlier.


apples down, starting to add the topping

 This is a cute and clever cookbook meant for those just moving away from home with hardly an idea how to cook, or take care of themselves for that matter.


ready for the oven

The book covers a lot. In addition to being a cookbook, it teaches you things like how to read labels and how to save on energy costs. It even lets you know how to make everything from drain cleaner to ant killer with every day household ingredients.


The recipes are simple, as they should be. But not boring, like I anticipated.


Our free range chickens on the left sharing a nibble with a deer on the right. In the middle is the windmill my husband made.

This recipe for example. What a splendid idea! Breakfast apple pie. I love it! I did change so much about the recipe that it is no longer recognizable. Theirs has biscuit mix, mine doesn't. Mine has oats, theirs doesn't, and the list goes on.

I could only hope that it would turn out well with all the changes. Yes, hurray! It did. Very well indeed. It's a moist nutty cake with oats and brown sugar, topped with apples and cinnamon. This would be great served at brunch with other savory items like an omelet and some bacon.

Or eat it alone as your dinner like I did. Still delicious, easy and heartwarming.


Breakfast Apple Pie

General idea from "Where's Mom Now That I Need Her" by Betty Rae Frandsen, Kathryn J. Frandsen and Kent P. Frandsen

This recipe by me, Melissa aka The Alchemist

Ingredients

For the pie

1 egg

4 Tablespoons cooking oil, (vegetable oil, or grape seed oil, something with a neutral taste)

1 cup (237 ml) milk

2 tsp. vanilla extract

1/2 cup (75 g.) brown sugar

1 cup (100 g.) flour

1/2 cup oats (50 g.) (quick or old fashioned, don't use instant)

2 tsp. baking powder

1 tsp. baking soda

1/2 tsp. salt

1/2  tsp. cinnamon

1/2 cup (50 g.) chopped walnuts, or pecans - unsalted


For the Topping


2 large apples - peeled and sliced

4 Tablespoons brown sugar

1/2 tsp. cinnamon

2 Tablespoons butter cut in small pieces


Directions

Preheat oven to 375 degrees Fahrenheit, 190 degrees Celsius, or Gas Mark 5.

In a large bowl beat the egg with a whisk. Add the oil, milk and vanilla and whisk together. Add the brown sugar and whisk again. In another medium size bowl add the flour, oats, baking powder, baking soda, cinnamon and salt and whisk together. Add the dry ingredients to the wet and mix with a whisk or a wooden spoon until blended. Stir in the chopped nuts.

Mix together the brown sugar and cinnamon in a small bowl for the topping, set aside.

Grease a 9 inch pie plate, and have your apples sliced and topping ready.

Pour the pie batter into the greased pie plate. Add the apple slices decoratively slightly overlapping in a circle and then arrange more in the middle.  Sprinkle with the cinnamon and brown sugar topping. Dot the butter in small pieces around the top of the apples.

Bake in the preheated oven for 45 - 50 minutes, until a knife poked in the center comes out clean.

This is best served warm the same day it's made.

Tuesday, May 1, 2012

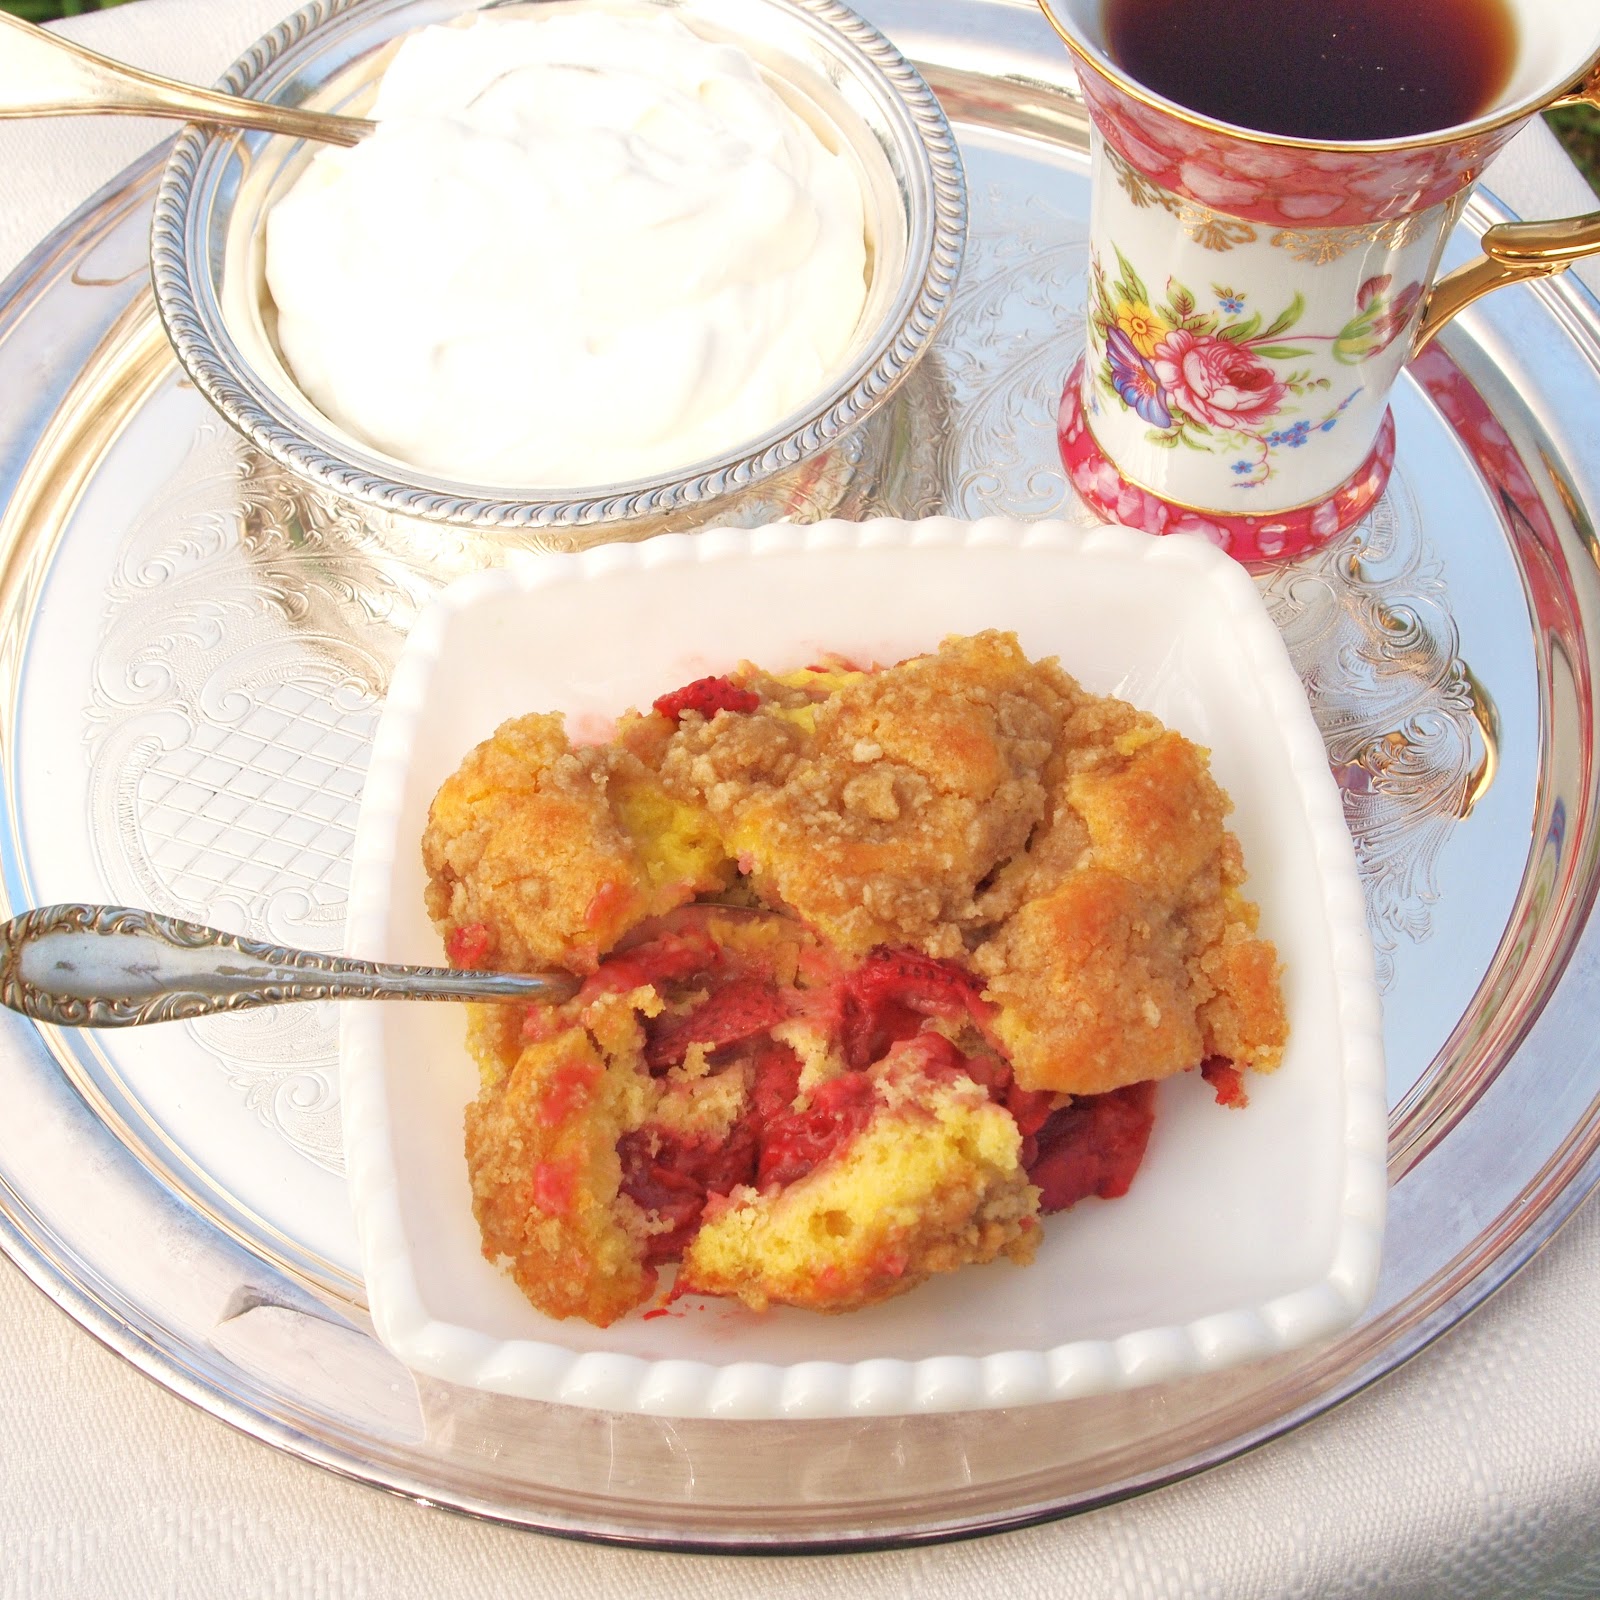
Strawberry Crumb Cake


"For beautiful eyes, look for the good in others; for beautiful lips, speak only words of kindness; and for poise, walk with the knowledge that you are never alone."

-Audrey Hepburn 1929-1993, Actress


I've been away, but baby I'm back. It's spring and I've been busy with spring time happenings. Gardening, cleaning and new adventures abound. Plus I've got a new endeavor I'm working on, but more on that later. Now for this delicious spring time dessert, strawberry crumb cake.

Gorgeous strawberries

I saw this recipe on Food and Wine and I was smitten. I love any crisp/cobbler/brown betty/slump, all of it, I'll take it. Yes please. Sign me up. Warm fruit with topping, I'm there. So as you can see, I was excited to try this one.


cut berries waiting to be utilized

Even though generally I love warm fruit with topping, warm strawberries alone I wasn't so sure about. I make fruit crisp all the time, in fact Any Fruit Crisp is what I called it, boasting about how you can use any fruit you'd like. And in fact I have even eaten it with strawberries alone, (somehow I feel strawberries with rhubarb is a whole different ball game) and remained on the fence. There's something about fresh strawberries that is so perfect. How can you mess with perfection?

macerating the berries


Then I read the description of this recipe on Food and Wine where the author of the recipe, Gerard Craft cooks the strawberries till their "warm and jammy." Warm and jammy? Are you kidding me? I love strawberry jam and make it often. So when you put it like that. Sold.


Before spreading on the cake batter.- note- my cake batter is so yellow because I have free range chickens who lay eggs with a bright orange yolk. If you get eggs from the grocery, yours won't be so bright yellow, FYI.


First you start with strawberries, lots of them. Three pounds to be exact. Macerate the berries, add some cake batter then to top things off you add a sweet crumbly topping. I was skeptical if that extra step of adding the crumb topping was going to make all that much of a difference. But I discovered oh, it does.

spreading on the cake batter

The strawberry portion of this cake isn't all that sweet. Sweet enough, don't get me wrong, it is a dessert. But when paired with the cake and crumb topping it is divine. A symphony all playing together to create a lovely dessert that is better than the ingredients alone.


added the crumb topping, now headed for the oven

This dessert is incredibly delicious. In fact my husband who doesn't really eat dessert, ate this and after one bite said, "this is good", took one more bite and said, "this is really good", another bite, another exclamation of it's goodness, till the whole bowl was gone.


Straight from the oven, warm and jammy indeed.


The new endeavor I mentioned earlier, is that I've started my own Etsy shop! I'm pretty excited about it. I will sell vintage dishes and housewares. Even though they are considered vintage, many are timeless. I've been collecting vintage serving ware and dishes of all kinds for years. In fact I bought my first set of dishes at a second hand store in Big Bear, California while vacationing long before I had my own kitchen to use them. I fell in love with them and had to buy them. I don't know what comes over me. I feel like it's my duty to rescue them. I still do that, search and rescue. Now I have a place to share my findings so I can keep collecting. I'm still adding items to my shop, so it's not finished, I am just starting. To get a sneak peek, my Etsy shop is called, House of Lucien. (Lucien is my precious little papillon.)


Strawberry Crumb Cake

This can also be made with a combination of raspberries, blackberries or blueberries.

adapted from Food and Wine, recipe by Gerard Craft


Ingredients

Fruit

3 lbs fresh strawberries, (approx. 8 cups or 1 1/2 kilos) hulled and halved

1/2 cup (100 g,) sugar

1 1/2 Tablespoon fresh lemon juice

2 Tablespoons cornstarch dissolved in 2 Tablespoons of water

1 vanilla bean, split and seeds scraped out, or substitute 2 or 3 tsp. of vanilla extract


For Crumb Topping

1/2 cup (75 g.) lightly packed light brown sugar *note- if you don't have brown sugar either make your own by mixing some white sugar with a little molasses, or you can substitute white sugar, although the flavor of the topping will be better with brown.

1/2 cup plus 2 tablespoons (60 g,) flour

Pinch of salt

4 tablespoons unsalted butter, room temperature


For Cake

2 1/4 (225 g.) cups all-purpose flour

1 tablespoon baking powder

3/4 teaspoon salt

1 stick (1/2 cup) (8 Tablespoons) (113 g.) unsalted butter, softened

1 1/4 cups (250 g.) sugar

3 eggs

1 1/2 teaspoons pure vanilla extract

3/4 cup (6 oz.) (177 ml) buttermilk *note- if you don't keep buttermilk in the house just use some soured milk by taking regular milk and adding a Tablespoon or 2 of lemon juice or vinegar and let it sit for 15 minutes.


Directions

Preheat oven to 350 degrees Farenheit, 180 degrees Celsius, or Gas Mark 4.

In a large bowl, toss the strawberries with the sugar, lemon juice, cornstarch slurry and vanilla seeds or vanilla extract, and let stand until the berries release some of their juices, about 30 minutes. Pour the fruit filling into a 9-by-13-inch glass or ceramic baking dish set on a sturdy baking sheet.

Make the crumb topping. Place all crumb topping ingredients in a medium bowl, use a fork to mash all ingredients together until the butter has mashed up with the other ingredients enough where pea sized pieces of crumb topping appear. Set aside.

Make the cake batter. Using a hand held electric mixer, or use a stand mixer, cream together the butter and the sugar until light and fluffy, about 3 minutes. Add the eggs one at a time, mixing well between each addition. Add the vanilla and mix again. Mix together the flour, salt, and baking powder in another large bowl and whisk well. Scrape down the bowl and add the dry ingredients to the batter in 3 additions alternating with the buttermilk or soured milk, if using.

Spoon the batter over the fruit, smoothing the battter to the edges. Sprinkle with the crumb topping. Bake in the center of the oven for 1 hour and 15 minutes, until the fruit is bubbling, the crumb topping is golden and a toothpick inserted in the center of the cake comes out with a few moist crumbs attached. Transfer to a rack to cool slightly. Serve the crumb cake warm or at room temperature with whipped cream or ice cream if desired.

Saturday, March 3, 2012

Beef and Guinness Stew


"Who cares how time advances? I am drinking ale today."

- Edgar Allan Poe


My husband's favorite beer is Guinness. We have it in the fridge at any given time. So every year around St. Patricks Day when I see beef and Guinness recipes, I always think, "I should be making that." But I hadn't till now, don't ask me why. In fact, I make beef stew often enough. Silly, I say.


My very large hunk of beef chuck ready to be cut up for stew


Silly indeed, because folks, this is delicious! Absolutely scrumptious! Beef and Guinness were made for each other, I'm telling you. Once it cooks down and all of the flavors have melded, you probably couldn't even tell that is what you were tasting. So it doesn't have a strong alcohol taste, or even a strong beer taste like I thought it might due to the fact that I added 2 bottles of it. The gravy tastes slightly like malt. It's savory and beefy with a hint of fresh flavor from the herbs.


Cutting up the chuck for stew

I made a large batch. I used 4 lbs of beef chuck and it filled my 6 quart slow cooker. You could easily make half that amount, and use a 4 quart crock pot if you'd like.

My pieces of beef that have been dredged in flour in the oil to be browned

I prefer using chuck for beef stew, and pot roast for that matter. I find it gets the most tender, and has the best flavor. My butcher sells it in that large piece (pictured above). That adds a little more work than if you were to have purchased stew meat that is already cut into pieces. The problem is, beef stew meat is usually beef round. It's much leaner than chuck and well, fat = flavor, and round doesn't have much of either.


Beef getting seared

Whenever I want to cook something low and slow like this, I go for the slow cooker. I prefer the results to oven cooking. But if you need to cook it in the oven, go for it. I've added oven directions in the recipe as well.


Fresh herbs into cheesecloth

This recipe is best made the day before serving for two reasons. One is so that the flavors can really marry. The second is while it is cooling overnight in the fridge, the fat rises to the top and solidifies, making it easy to skim off the next day.  This makes it a great dish to serve to company. Paired with a nice salad and some crusty bread you'll have quite a tasty meal.


My stew just placed into the crock pot (I used a 6 qt. since I made a large batch)


Looking for some more Irish recipes?

How about some Irish Coffee Cupcakes- (these are very good!)

Or some Luck Of The Irish Cookies- O.K. these aren't really Irish, but they are fun and yummy!

Or complete your meal with some traditional Irish Soda Bread- this is a great bread for novice bread bakers, and it would be perfect with this stew.


It took me a while to make it for the first time, but it won't take me long to make it for the second time!


My little Papillon, Lucien. My husband took this picture and I fell in love with it, so I wanted to share it with you.


Beef Stew with Guinness

this makes a large batch, enough for 8 roughly, but it can easily be halved

Keep in mind this recipe is best eaten the day after it's made.

Ingredients

4 pounds of Beef Chuck, cut into 1 1/2 inch pieces, and with large pieces of fat trimmed off. There should be fat marbled throughout it, but if there are large pieces of fat, cut them off.

2 bottles of Guinness beer

6-8 cups (1 1/2 - 2 liters) beef stock, homemade is better, or a good brand that is low sodium

5-7 carrots (depending on size and how many you want), peeled and sliced diagonally

1-2 large onions, peeled and chopped

3 bay leaves

fresh herbs- I used a combination of a few thyme sprigs, a large rosemary sprig and some parsley (I have fresh herbs growing in my garden) if you need to buy fresh herbs I would just get either some thyme or rosemary whichever you prefer and use either 3 thyme sprigs or 2 rosemary sprigs.

salt and freshly ground pepper

flour for dredging

olive oil or vegetable oil for browning meat

about 5 cooked cubed potatoes to add after stew is cooked, (so they don't get over cooked in the stew if using crockpot, or alternately add them raw halfway through cooking time. If cooking in oven, add them raw per directions below.)

1-2 Tablespoons cornstarch for thickening the sauce if needed

fresh parsley- minced, for topping individual servings (optional)


Instructions


The day before you want to eat this, start by browning the meat. Cover all sides of the cubes of meat with salt and freshly ground pepper. Place some flour (about 1/2 cup, you can add more as needed) into a shallow dish like a pie plate. Dredge the seasoned meat cubes in the flour.  Use a large dutch oven or large frying pan and add a few Tablespoons of oil and turn onto medium high heat. When pan is hot, place an even layer of cubes into hot oil. Don't crowd the pan, you're going to do this in batches. Get it nice and brown on one side (not grey, but brown) then turn the cubes and cook till brown on all sides.This is only about getting some color on the meat, it doesn't matter if they aren't cooked throughout. Remove them when done into another clean dish, and repeat until all the cubes are browned on all sides.

In the same pan, add a little of the beef stock and with a wooden spoon, scrape the bottom to remove the fond (the bits from the browned meat) and pour it all in the crock pot/slow cooker.

Add the ingredients in a few layers to your slow cooker. First add about half of the meat, then add about half of the carrots and onions, then more beef, then more carrots and onions. Add the bay leaves, and add the 2 bottles of beer. Now add enough beef stock to cover it all well, for me it was around 8 cups.

Place the fresh herbs in a cheesecloth bag, or tie them up with twine for easy removal later. Add the herbs and submerge into the stew.

Cook on low for 8-10 hours.

When finished, turn off cooker, remove the crock from the base if you can to let cool slightly. Place the covered crock in the fridge to cool overnight.

The next day remove from fridge and scrape off the fat that has risen to the surface and discard. Pour or ladle the contents of the crock into a large dutch oven to heat. When it's heated, taste it to check for seasoning. Add salt and pepper if needed. If you would like the sauce to be thicker, either reduce it., or add a cornstarch slurry by placing 1-2 Tablespoons of cornstarch (use 2 Tablespoons if you want it thick) into 2 Tablespoons of cold water and mix well. Add that to the hot stew and bring to boil. Right before serving add the cooked potatoes. Top individual servings with chopped parsley if desired.


For Oven Cooking-

Follow directions above, except when placing all the ingredients into the slow cooker place into a large dutch oven, like a big Le Cruset pan that has a tight fitting lid.

Cook with the lid on tight, at 300 degrees Fahrenheit, 150 degrees Celsius, or Gas Mark 2, for about 4 hours. After 3 hours of cooking you can add the diced potatoes, raw, and continue cooking for another hour. Then continue recipe as stated above.

Saturday, February 4, 2012

Pink Velvet Cupcakes


"Love is the greatest refreshment in life."

 ~Pablo Picasso


Pink velvet cupcakes, what does that mean, you ask? We all know a red velvet cupcake  is a buttermilk cupcake with a touch of cocoa. And yes, there are indeed a few versions of pink velvet cupcakes that are basically a red velvet cupcake but with only a tiny hint of cocoa. One recipe I read had only one teaspoon. There are many versions of pink velvet cupcakes that are only a white cupcake dyed pink. And there are a few versions that are a white chocolate cupcake dyed pink. A good idea I thought.


Ultimately what I discovered is that a pink velvet cupcake is a pink cupcake in whatever flavor you want it to be.


pureeing the strawberries

So I created my own pink velvet cupcake. A strawberry flavored pink cupcake with a whipped white chocolate ganache frosting. Wow these are good!


reducing the strawberry puree


I made a few versions of these to get it right. They contain pureed strawberries, and you need quite a bit to get a good strawberry flavor. I achieved the best taste when I reduced the puree to concentrate the flavor. They also contain strawberry extract to further bring home the strawberry goodness. I used Watkins strawberry extract and I promise you I couldn't tell there was extract in these. The flavor was excellent. I happened to have this in my pantry, but  I was at my local Walmart and I noticed they carried this item in the baking aisle.


When reducing the strawberry puree, I kept this measuring cup nearby so I could measure when it had reduced enough


The texture of these cupcakes is something I was very happy about. They are fluffy and moist at the same time. The perfect texture, I believe.


This is the color of the batter without pink coloring, the cooked cupcakes turned out slightly grey


This is the color after I dyed it


Paste pink colorings I used


I used some fancy cupcake holders I purchased at Michaels


The cupcakes themselves are not too sweet. So the decadent whipped white chocolate ganache is the perfect topping.


Just out of the oven

The perfect cupcake for a Valentines Day celebration!


melting down the white chocolate and butter


the ganache whipped into a frenzy


Never miss a post! Like The Alchemist on Facebook!


Happy Valentines Day!


Pink Velvet Cupcakes

an original recipe by me, Melissa aka The Alchemist

makes 12 standard size cupcakes- if you use the type of wrappers in the picture, it makes only about 9, but the recipe is easily doubled.

Ingredients for cupcakes

1 cup (235 ml) pureed strawberries (fresh or previously frozen strawberries pureed in a food processor or blender)

1 1/2 cups (150 g.) flour

1 tsp baking powder

3/4 tsp baking soda

1/2 tsp salt

1/2 cup (1 stick) (113 g.)  unsalted butter, room temperature

1 cup (200 g.) sugar

2 eggs

1 tsp vanilla extract

1/4 cup (2 oz, or 57 g.) sour cream or yogurt

1 Tablespoon strawberry extract (I used Watkins brand)

pink food coloring paste, or gel


Whipped White Chocolate Ganache Frosting

Ingredients

12 oz. (340 g.) good quality white chocolate (I used Lindt) (chopped) or white chocolate chips

1/2 cup (125 ml) heavy cream

2 Tablespoons butter


Directions for cupcakes

First you need to reduce the strawberry puree. Place the puree in a small saucepan and cook it on medium high heat for 10-15 minutes stirring frequently until reduced to 2/3rds of a cup (or 150 ml). (Have a Pyrex measuring cup next to the stove to check it periodically.) It will get darker in color and thicker as it reduces. Cool the puree in the fridge until room temperature or cool. You can make the puree in advance, of course.

Preheat oven to 350 degrees Fahrenheit, 180 degrees Celsius, Gas Mark 4. In a medium bowl, whisk together the flour, baking soda, baking powder and salt, set aside.

Using an electric mixer, or a standing mixer with the paddle attachment, cream the butter till fluffy. Add the sugar and cream it together till light and fluffy. Add the eggs one at a time, blending after each addition.

Mix the sour cream and both extracts into the reduced strawberry puree. Add half of the strawberry mixture and blend, then add half of the flour mixture and mix, then the other half of the strawberry mixture, and mix again, then add the remaining flour mixture. Blend until incorporated, make sure you scrape down the sides of the bowl with a rubber spatula. Now add the pink food coloring and mix. Add a little at a time until the desired hue is reached. If you don't add the pink color the cupcakes will be a drab grayish color.


Fill cupcakes 2/3rds to 3/4 of the way full.


Bake in preheated oven till a toothpick comes out clean, about 20-22 minutes.

Meanwhile, start the frosting.

When cupcakes are finished baking, cool on wire racks until cooled.


Directions for frosting

In a medium saucepan heat the cream until it just starts to simmer and remove from heat. Add the white chocolate and the butter and stir until the chocolate is melted and the ganache is smooth.

Transfer the ganache to a large mixing bowl or the bowl of a stand mixer. Chill in the fridge until it is slightly cool, about 30 minutes. Stir it after 15 minutes. It is important that the ganache is at the right temperature. If it is too warm or too cool, it won't whip up correctly.

Using the whisk attachment on a stand mixer, or a hand mixer. whip the ganache for about 5 minutes until it's good and fluffy. If it doesn't whip up, it may be too warm. Or if it looks curdled when you whip it, it may be too cold.

Frost the cupcakes when they have cooled completely.

Serve at warm room temperature. If they are cold, the frosting will be hard.