Showing posts with label pie. Show all posts

Friday, November 15, 2013

The Best Pumpkin Pie Recipe


"Thanksgiving is the holiday of peace, the celebration of work and the simple life... a true folk-festival that speaks the poetry of the turn of the seasons, the beauty of seedtime and harvest, the ripe product of the year - and the deep, deep connection of all these things with God. "

-Ray Stannard Baker (David Grayson)


It's almost Thanksgiving. That time of year where we feast! There's turkey, and sweet potatoes, mashed potatoes, and pie. Stuffing, cranberry sauce, gravy and green beans. Festivities abound! It's also the time of year where we give thanks for all we have. A time to enjoy our friends and families on this beautiful day.


Getting the crust ready to be filled
 
 
The pie that comes to mind during this sumptuous time of year, is of course, pumpkin.
 
My husband and I are pumpkin pie aficionados. You see, my husbands favorite dessert of all time is pumpkin pie. He asks for it instead of cake on his birthday in March. I mean, he really likes pumpkin pie. You know me, I love all desserts. Pumpkin pie included.
 

If you are using my pie crust recipe you need to keep the edges inside the rim, or else they might hang over while cooking.


For years I hosted a Thanksgiving feast at my home for friends since I don't live close to family anymore. I always wanted it to be really fantastic. I wanted the food to be amazing, extraordinary. A banquet like no other. Where every luscious bite that you take is so scrumptious, so enjoyable and mouthwateringly delectable, that you'd never forget it.


This Dark Muscovado sugar really makes this recipe special. Muscovado sugar is an unrefined sugar made from the juice of sugar cane by evaporating it and draining off the molasses. It can be found at Whole Foods, or a fancy grocery store, such as Bristol Farms, or some well stocked natural foods stores. Or it's available online at Amazon. But try to find it locally, since it's quite pricey on Amazon. I paid only about 5 bucks for mine at a natural foods store. I highly recommend you use it, but if you absolutely can't find it, substitute brown sugar, plus add another tablespoon molasses.
 
I mean if I'm going to go to the effort, why not go all the way? Why settle for less? I feel it is also having a respect for my guests. Showing reverence by way of food. They took the time to come over and share my table during this precious time of year. Paired with the fact that most people rarely take time to cook from scratch. Takeout, restaurant food, frozen food and packaged foods is what most people eat when they sit down to dinner. On this great day I want it to be different. I want them to eat a well prepared, wholesome, homemade meal.


Those soirees, combined with our love for the pie, led me on a quest for the absolute best pumpkin pie around. After years of baking different recipes, this pie rose above all others. It's been my go to pumpkin pie recipe for a few years now.

The base of this recipe is adapted from Bobby Flay. His recipe calls for Bourbon Maple Whipped Cream and a crunchy topping. I've made it according to the recipe, and myself and our guests didn't care for the topping. We all loved the pie in a more simple form.
 
 
This recipe has molasses in it as well, which gives it a deep flavor.

This recipe is richer, and has a deeper, warm flavor, than a traditional pumpkin pie. It calls for more eggs, and heavy cream instead of the typical evaporated milk, usually called for in pumpkin pie, which makes it even more decadent. This is something I really like, since I prefer the taste of cream to canned milk. I mean if I don't like evaporated milk, why am I going to like it in pumpkin pie?


I like to strain the filling, just in case there are some bits of the muscovado sugar that didn't get dissolved.

.
What really makes the flavor of this pie stand out is the dark muscavado sugar. It has a  deep, rich, bold flavor that I'd never experienced before finding this recipe. It compliments the pumpkin pie wonderfully, it's just excellent. You will find a lot of tasty ways to consume the remainder of the package. In oatmeal, ice cream, brownies, or even try your hand at sticky toffee pudding. Anywhere you would use brown sugar, you can substitute dark muscovado sugar.


Brushing the crust with an egg (or an egg white, either way) gives the bottom a barrier, so it is less likely to get soggy from the filling. Also it makes the crust nice and golden brown.

The great thing about this recipe is that it takes only slightly more work than any ordinary pumpkin pie. Don't you just love a recipe that is easy but gives a big payoff? Me too.


Baking the pie on a preheated cookie sheet gives the bottom crust a head start in cooking.
 
During this time of Thanksgiving, I want to express a big Thank You! To you, my readers. I love hearing about how your cupcakes turned out, and how they've made you a superstar at home. Or how you've added your own signature touch to one of my recipes. Sometimes the ideas are so good, I use them myself. The feedback touches me and makes sharing recipes so much more gratifying.

I wish you and your family peace and happiness this holiday season!


Some of my Thanksgiving decorations. That's Romeo on the right, I miss him so.
 
 
 "Gratitude unlocks the fullness of life.  It turns what we have into enough, and more.  It turns denial into acceptance, chaos to order, confusion to clarity.  It can turn a meal into a feast, a house into a home, a stranger into a friend.  Gratitude makes sense of our past, brings peace for today and creates a vision for tomorrow."
 
-Melody Beattie 
 

Our fireplace. Mickey reminds me everyday that magic is indeed everywhere.


This is my pantry door in the kitchen.


A plaque that hangs in the kitchen this time of year.


Happy Thanksgiving!

"May your stuffing be tasty
May your turkey plump,
May your potatoes and gravy
Have nary a lump.
May your yams be delicious
And your pies take the prize,
And may your Thanksgiving dinner
Stay off your thighs!"


-Grandpa Jones


This is almost enough whipped cream for me and my piece of pumpkin pie.


Never miss a post! Follow The Alchemist on Facebook! Or Pinterest!


Silverplated Footed Butlers Tray, Vintage Stainless Cake Server, Vintage Old Ivory Syracuse China plates, and the Tan Cloth Damask Dinner Napkins, available at my Etsy shop, House of Lucien.


The Best Pumpkin Pie Recipe

This makes one deep dish 9 or 10 inch pie

Ingredients

Pie crust - deep dish 9 or 10 inch - Frozen or homemade, may I recommend my Best All Butter Pie Crust recipe, it's amazing. If you use it you only need half of a recipe. Either freeze the other half, or just halve it.

3 large eggs

3 large egg yolks

3/4 cup (165 g.) Dark Muscovado Sugar, packed - see note above about this

1/4 cup (54 g.) brown sugar, packed

2 Tablespoons molasses

1 - 15 oz. can of pumpkin puree - NOT pumpkin pie filling

1 1/2 tsp. ground cinnamon

1 tsp. ground ginger

1/2 tsp. freshly ground nutmeg

1/4 tsp. ground cloves

1/2 tsp. fine salt

1 cup (8 oz. or 236 ml.) heavy cream

1/2 cup (4 oz. or 118 ml.) whole milk

3 tsp. pure vanilla extract

3 Tablespoons unsalted butter, melted

an egg or egg white, beaten with a splash of water (either way, it works, I just happened to have an egg white in the fridge so I used it.) - For brushing on the crust


Directions

Have your pie crust ready in a deep dish 9 or 10 inch dish, glass or Pyrex is best. Preheat the oven to 400 degrees Fahrenheit, 200 degrees Celsius, Gas Mark 6. Put a cookie sheet in the oven to preheat in the bottom third of the oven.

In a large bowl, add the eggs, egg yolks, both sugars and the molasses, whisk it together. Add the pumpkin puree, cinnamon, ginger, nutmeg, cloves, and salt and stir it all together with a large spoon. Whisk in the heavy cream, milk, and vanilla. Strain the mixture through a strainer set over another bowl. Whisk in the melted butter.

Brush the entire crust with the beaten egg or egg white. This forms a barrier between the filling and the crust, so it's less likely to get soggy. Also brushing it on the edges of the crust makes them nice and golden brown.

Remove the cookie sheet from the oven. Place the pie crust on the preheated cookie sheet. Now pour the filling inside the pie crust, place back in the oven and bake for 15 minutes. Then turn down the oven to 300 degrees Fahrenheit, 150 degrees Celsius, Gas Mark 2 and bake another 60-70 minutes. It's done when the center is set and it's no longer jiggly in the middle.

Let it cool on a wire rack for at least an hour. Serve slightly warm, room temperature, or cold, topped with freshly whipped cream, if desired. Cover and refrigerate the leftovers.

I hope you love this recipe as much as I do! Happy Baking!


Sunday, October 13, 2013

Double Crust Peach Pie with Fresh Peaches


"Candy might be sweet, but it’s a traveling carnival blowing through town. Pie is home. People always come home.”

- Pushing Daisies


I don't bake a lot of pies. If you are familiar with this blog, then you know this. There are not a lot of pie recipes here. In fact I only recently posted a pie crust recipe, which is amazing by the way, if you haven't checked it out.


My peeled peaches, done by dropping them in boiling water for 30 seconds, then put in an ice water bath. The peels just slip right off.
 
That's just the thing, though. I need for a recipe to be amazing. Many pies are not amazing to me, so why bother?  But here's the thing. Other people love pie. I need to make a pie sometimes. Upon request, or at the holidays. So I want to make a good one. Call me a people pleaser.


My peach peels and pits. Did you know you can make peach jelly with just the peels and seeds?

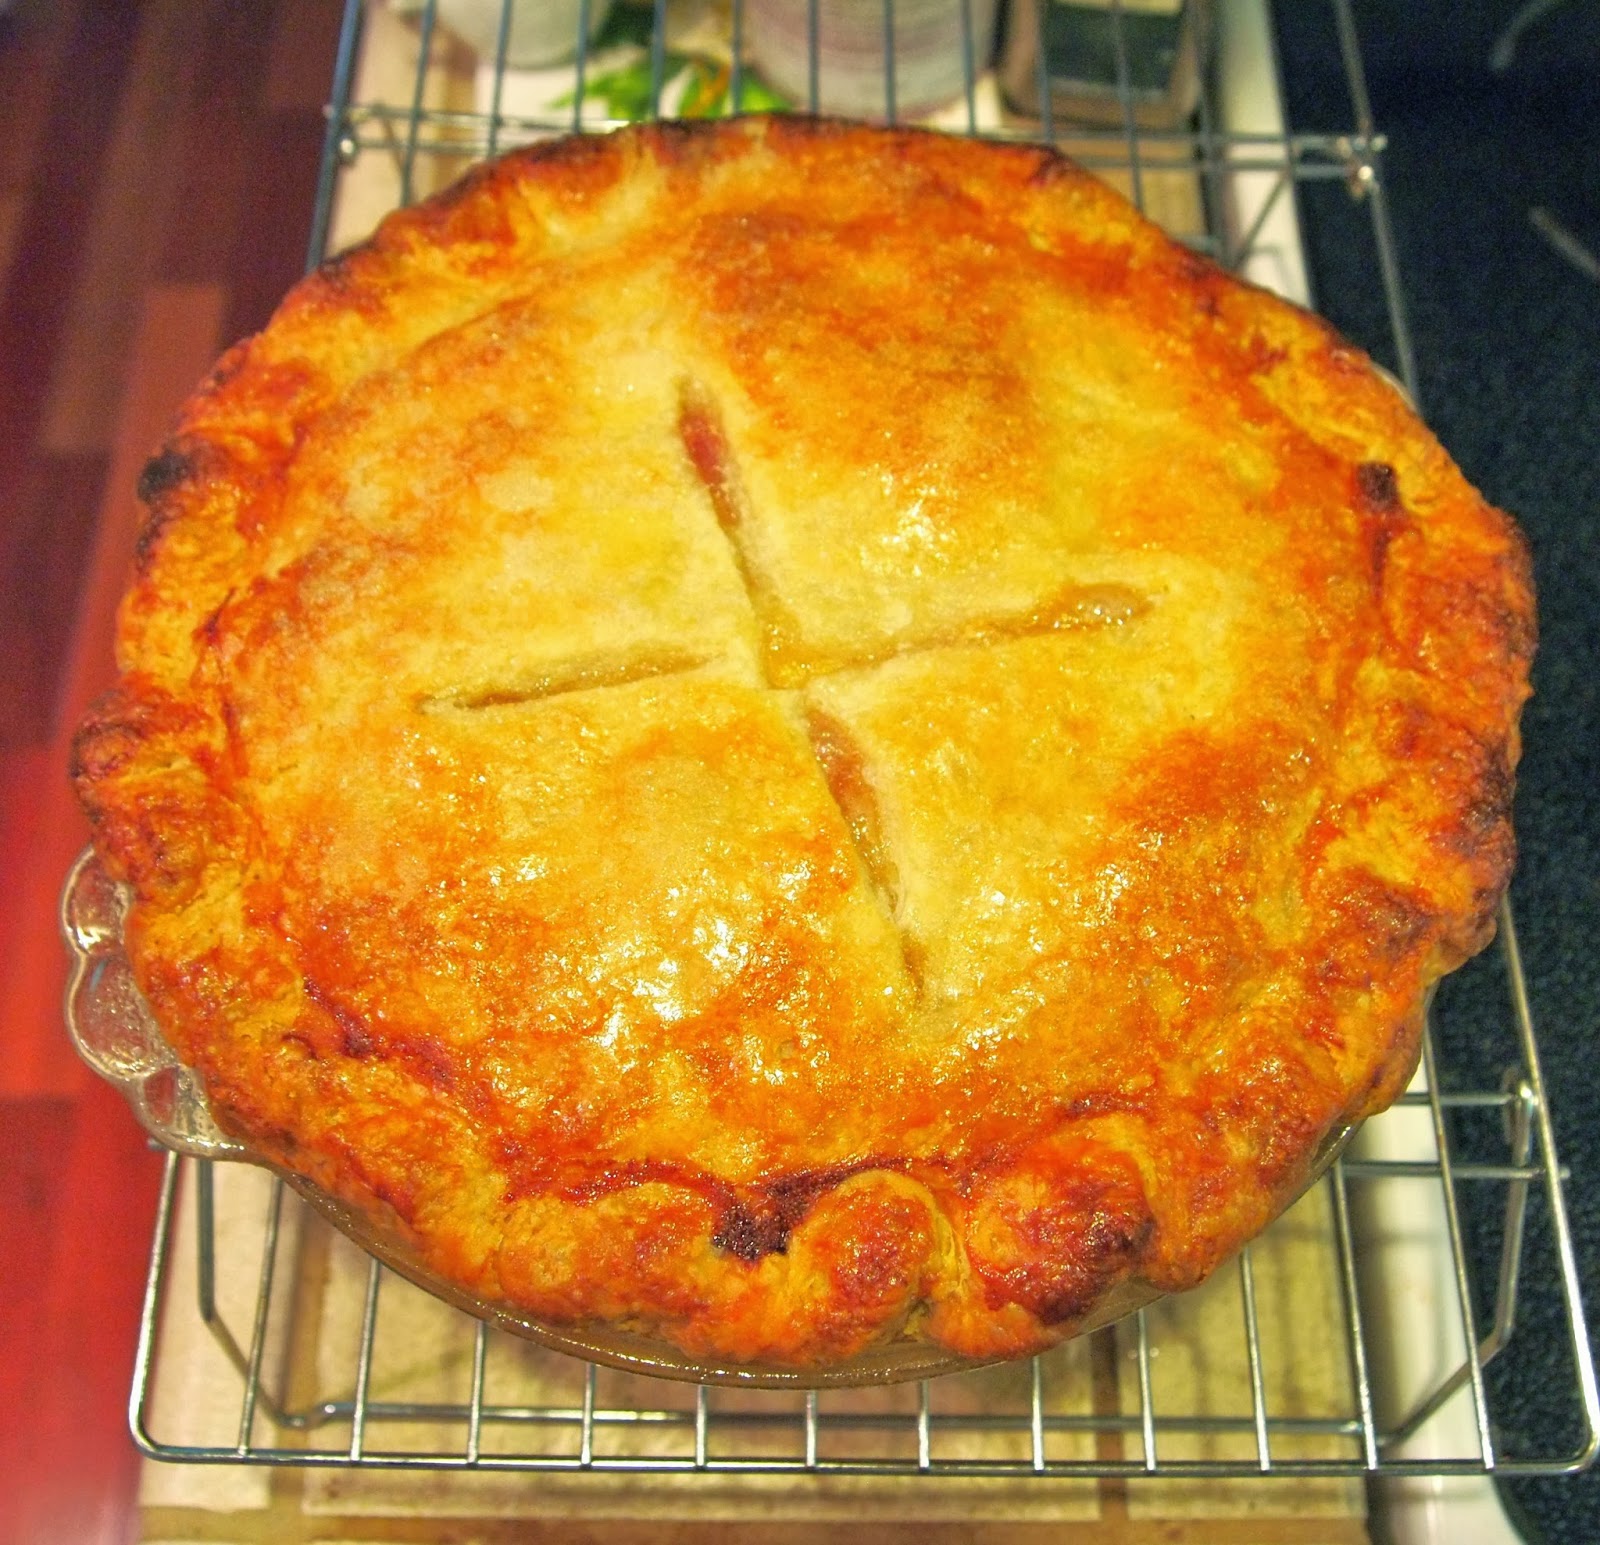
I don't know if you could call this recipe amazing. It's a pretty straightforward peach pie. I think the job of a summer fruit pie recipe, peach or berry, should be to just highlight the ripe fruit. To put it up on a pedestal and shine a really flattering light on it. Which this recipe does nicely. If you use my crust recipe, it will be encased in a super buttery and flaky pastry, so it will be a pretty darned delicious pie.


My pie ready for the oven

Peaches are one of my very favorite fruits. So if I'm going to make pie, or eat pie, peaches is a good choice for me. I like my peach pie to be pretty classic. I don't like cinnamon or nutmeg in there. I just want good old ripe peaches mixed with sugar and just a bit of lemon juice. You can't really taste the lemon juice, it just adds a bit of contrast to all of that sweet. And your peaches do need to be ripe. Your peaches should be juicy, sweet, and delicious on their own.


Here is the best way to use leftover pie crust. Make pie crust sticks, of course! Especially if you are using my Delicious All butter pie crust. Just sprinkle on some sugar and bake until puffed and golden brown, about 20 minutes.

I used flour as the thickener for this pie. I made a few different versions of this pie and I liked flour the best. Cornstarch seems a little too gel -y, and tapioca is just too well, tapioca - like for me. I don't want those little pearls in my pie. I just want a straight up delicious, old fashioned peach pie, darn it.

The one thing I don't like about flour as a thickener is that it looks a little cloudy in the pie. That is the only caveat, in my opinion.


Golden Brown and delicious


With the holidays around the corner, I see more pie in my future. That should make the people around me happy. And it makes me happy to make them happy.

 
Never miss a post! Follow The Alchemist on Facebook! Or Pinterest!


Tan Vintage Damask Dinner Napkins, Vintage Copper Kettle, Vintage Arthur Wood Mug, Heritage Hall English Transferware Plate, and Old Ivory Syracuse China Dessert Plates available at my Etsy shop, House of Lucien.


Double Crust Peach Pie With Fresh Peaches


Ingredients

Pie Crust for a 8 inch deep dish pie or a 9 inch Pie Try my recipe for The Best All Butter Pie Crust Recipe If you are using my pie crust recipe, please follow the directions in that recipe along with these instructions.

1 egg white beaten with a teaspoon of water

5 cups (980 g.) or 2 pounds, 3 oz. sliced and peeled ripe peaches

1 Tablespoon fresh lemon juice

1/2 cup (70 g.) all purpose flour

1 cup (200 g.) white sugar

2 Tablespoons butter

additional sugar for topping the pie

Directions

Preheat oven to 400 degrees Fahrenheit, 200 degrees Celsius, Gas Mark 6. Place a cookie sheet covered in foil in the oven to preheat. ** Read the recipe before making, if you are using my pie crust recipe don't preheat the oven now, do it later after freezing or refrigerating the prepared pie.

Line the bottom and sides of pie plate (glass or pyrex is best) with the crust. Brush the bottom of the crust with some of the beaten egg white, this will help keep it from getting soggy while baking.

Place the sliced peaches in a large bowl and sprinkle with the lemon juice. Toss it gently. Mix together the flour and the sugar in another bowl. Pour over the peaches and mix gently. Pour into the pie crust and dot with butter. Cover with the other pie crust, and fold the edges under. Flute the edges to seal or press the edges with the tines of a fork dipped in egg. Brush the remaining egg white over the top crust and sprinkle it with sugar. Cut several slits in the top crust to vent steam.

***If you are using my pie crust recipe, or a homemade recipe, at this point I would recommend freezing or refrigerating the pie at this point for 30-60 minutes. To help calm the gluten in the flour after rolling. If you are using a frozen pie crust you don't need to do this. After doing that, if you haven't preheated the oven yet, do it now.

Place the pie on the preheated cookie sheet. Place it on one of the lower racks in the oven. This will help cook the bottom crust, so it doesn't get soggy.

Bake for about an hour. Check the pie after about 40 minutes to make sure the edges aren't getting too browned. If they are cover them with foil. It's done when the top and bottom is browned.

Let cool slightly on a wire rack. Serve warm with ice cream if desired.


Happy Baking!

Sunday, October 6, 2013

The Best All Butter Pie Crust Recipe


“We must have a pie. Stress cannot exist in the presence of a pie.”   
-  David Mamet, Boston Marriage


Pie crust, it may be one of the least homemade baked goods out there. Almost every recipe for a pie you come across calls for a frozen pie crust. I guess they know no one wants to go to the trouble to make one. And why should you make a homemade pie crust? It does take some work, and time. And for what? There needs to be a payoff for all of that labor.


Cutting up the butter
 
 
There are just some things that you can't buy in a grocery store. If you cook anything from scratch, you know what I'm talking about. Some things can only be made by your hands. And then, there are times you want the very finest, the crème de la crème. Like on Thanksgiving or Christmas, where you don't want anything but the very best.


This is what it looks like when it's done, when it just sticks together
 
Well, this is the best. Let me tell you a story. Just a few days ago, we ate dinner at a popular pie place in Seattle. The crust was so flaky, I mean the texture was just amazing, it melted in your mouth. But it had no flavor. I thought for sure it was made with all shortening. I asked, and it turns out it was made with lard. No biggie. That's fine with me, I'm not against lard, (vegetarians don't appreciate it, since they can't even have a piece of apple pie, since the crust is made of pig fat, but I digress.) But, I am against food that has no flavor. I mean it had a little taste, but not much. So my husband and I debated. What's more important? Flavor or flakiness?


Right out of the food processor

My husband says flavor, by a mile. He actually didn't love that pie crust no matter how flaky it was. He said when he got a bite of just crust, it dried out his mouth it was so flaky. Like he had a mouth full of sand. For myself, on the other hand, I was still debating it in my mind. For days, in fact.


After refrigerating, ready to roll out


Meanwhile, I was baking pies. I baked a lot of em. I made a version of this pie crust many times. I also made a shortening and butter combined crust a few times, which is the pie crust I usually make. The combined (shortening and butter) crust is a crust I've made a lot of times, but I was still on the fence about it. It just didn't excite me.


Tuck the top crust over the bottom crust, crimp, then make sure the crust stays inside the pie plate, or you risk it hanging over when it bakes. Also brushing the crust with egg white and giving it a sprinkle of sugar helps to get it nice and golden brown.

After lots of pie baking (and eating) and after giving it much thought, here's what I concluded. A crust full of lots of butter is the best. It's the best taste, by a long shot. But that's no surprise is it? This crust has a lot of butter in it. So with all of that fat, this crust is flaky. It's not as flaky as a crust with all lard, or shortening. The reason being is that those fats are 100% fat. Butter has some water content, it's not 100% fat. But no matter. This crust is almost like puff pastry. Not like that puff pastry you get in the grocery that's full of oils, but real, all butter puff pastry you would have to get from a specialty shop or make yourself. A few times when my husband and I took a bite, we even compared the taste to that of a croissant. Yeah, that's how delicious this crust is.

In fact, my husband, not a big dessert fan, loved and devoured the pies I baked with this crust. I needed to make a dessert for an event of his we were going to, and I thought he had decided on one. After eating these pies he changed his mind, all because he couldn't get enough of this butter filled pie dough.


Make sure the crust is inside the pie plate after crimping.
 
This crust rules over all others in the taste department, but it acts different than a typical pie crust. Call it a pie crust, or call it a pastry, remember how I said it's like puff pastry? Well it does puff up. It doesn't keep it's shape very well. So if you want to cut out shapes of leaves to put on top of your pie, or do a really decorative border, this probably isn't the recipe for you. There are a few tips to using this crust, (below in the recipe) to make it behave for you, that do need your attention. 
 

Here's what you do with leftover pie crust. You make pie crust sticks! Just sprinkle pie dough with sugar, slice and bake until browned.

But don't let that scare you. I used to be one of those people. One of those indifferent slackers who used premade pie crusts. The times I made a homemade one, was on holidays, or when I was feeling particularly domestic. I never wanted to. I didn't know a pie crust could taste like this. But now that I've made like, 10 pies in the last few weeks, I feel like Betty Crocker, or better yet, Lionel Poilâne. I feel like a magician, capable of transforming an often overlooked dessert into something so delicious, I would be proud to serve it to Gordon Ramsay. I actually have this recipe memorized. By the time I finished my last pie, I felt so exhilarated, I felt like I could challenge Bobby Flay to a pie crust throwdown.


Golden brown and delicious


But this is true for almost anything in life, isn't it? First you have a desire to be good at something. You research, and you learn as much as you can about it, to give yourself a good fighting chance. Then you do it. Then you do it again, and again. You make mistakes, but you learn from them,  and you don't get discouraged, because you want this. Then you actually get pretty darn good at it. The result? A skill you will have for the rest of your life. A skill that will make people love you (trust me on this.) A skill that will warm the hearts of your friends and family. A skill that will open peoples minds to how amazing a simple American staple like pie, can taste. That is a skill worth having, and time well spent, in my book. Now that is exciting.


Here's what you have to watch out for with this recipe, pie crust that hangs down. You need to tuck the pie crust in, so that when it bakes, it doesn't hang over the sides, like mine did here. The first time I made this crust I wasn't careful with this, and I had lots of hanging pie crust.

 
Never miss a post! Follow The Alchemist on Facebook! Or Pinterest!


Baking the pie in a glass pie plate and following a few simple steps, really does away with a soggy pie crust.

 
Tips for successful pie making:

Make sure to read the recipe all the way through before making.

The dough can be made days in advance and then kept in the fridge, plan accordingly. It also freezes well for months. Just double wrap it in plastic wrap, then place it in a zip top bag with the air removed. Let it thaw in the fridge and proceed with the recipe.

Add as little water as possible to the dough.

Mix it as little as possible in the food processor, meaning just pulse it, as few times as needed. Overworking the gluten in the flour makes a crust tough.

Refrigerating and freezing the dough when called for in the recipe allows the gluten to relax after being worked, which is going to contribute to a flakier crust as well as giving you less shrinkage when baking.

Use rice flour when rolling out the dough. This isn't absolutely necessary, but when rolling out pie dough, you want to use as little flour as possible so you don't work in too much of it, which can lead to a tough crust. If you use rice flour instead, you don't need to worry about working in too much flour, since rice flour has no gluten. Just roll out dough like you usually would, only substituting rice flour with all purpose.

Use a glass (or Pyrex) pie plate. This helps the bottom crust cook. Glass is a good conductor of heat. This will help the bottom crust to cook, and not be soggy. Actually if you preheat a cookie sheet in a 400 degree oven, then put your pie in a glass pie plate on the preheated sheet in a lower rack in the oven, this will give your bottom crust a head start in cooking.

Brush the top of your unbaked pie with egg white and sprinkle with sugar (don't use sugar if making a savory pie, only use the egg white) to get it nice and golden brown.

Brush the bottom of your pie crust with egg white before filling it, to prevent sogginess, it will form a barrier between the filling and the crust.

Bake a fruit pie at 400-425 degrees Fahrenheit, (200-220 degrees Celsius) (Gas Mark 6 or 7) in a lower rack in your oven. It takes about an hour for a double crust fruit pie. If the crust gets too brown before the time is up, cover the crust with foil. If it's not getting brown enough, about 15 minutes before it's done put it on a top rack in the oven to brown.

Freeze your pie (or at least refrigerate it) for about an hour after filling and before baking it. This will help calm the gluten as well as help prevent shrinking.


Peach Pie - one of the pies I made with this crust
 
Tan Vintage Damask Dinner Napkins, Vintage Copper Kettle, Vintage Arthur Wood Mug, Heritage Hall English Transferware Plate, and Old Ivory Syracuse China Dessert Plates available at my Etsy shop, House of Lucien.


The Best All Butter Pie Crust Recipe


This recipe is my own. It started as an adaptation from Ann Burrell's Pie Dough Recipe as well as a few ideas from America's Test Kitchen, mixed with knowledge I've learned over the years, combined with experience.

This recipe makes enough for 2 crusts, for an 8 or 9 inch pie, or one double crust pie. If you only need one crust, for a pumpkin pie, or a cream pie, freeze the other half, or simply halve the recipe. The dough will last for months frozen if double wrapped and then placed in a zip top bag and sealed. Simply thaw it in the fridge and continue with the directions from there.

This recipe contains vodka. Americas test kitchen is famous for using it in their pie crust. Their recipe uses more than mine, and their recipe is different. I've taken the idea from them. The reason it is a great element for a pie crust, is because gluten forms in water but not in alcohol. In a pie crust recipe you want to use the least amount of water as possible, but sometimes this makes it hard to roll out. By using a little alcohol it makes it easier to work with, without adding water, since the alcohol cooks out and leaves no taste. If you absolutely do not consume alcohol go ahead and leave it out, you may need to use a tablespoon or 2 more ice water.

Vinegar is used in the recipe because it helps prevent the formation of gluten, which will ultimately make for a flakier crust, you can't taste it since it is just a teaspoon.

Using the best quality butter you can get your hands on is a good idea here, since the butter is the star ingredient.

Ingredients

2 1/2 sticks (20 Tablespoons) or (285 g.) of very cold good quality butter, cut into small pieces then held in the fridge to get it cold again,  plus extra for greasing the pie plate

2 cups (268 g.) all purpose flour, plus more for rolling out the dough OR use rice flour for rolling

rice flour for rolling out dough, optional

2 Tablespoons sugar - omit if you are making a savory pie, like a pot pie

1/4 tsp. salt

1 tsp. apple cider vinegar

2 Tablespoons cold vodka

5-7 Tablespoons ice cold water


Directions

Get your ingredients ready. Get your food processor out.  Have the butter cut into small pieces, then placed in the fridge until needed. Have a cup of water with a few ice cubes in it next to your food processor to use as your ice water. Make sure your vodka is cold.

In the bowl of the food processor add the flour, sugar and salt and blend together. Take the butter pieces out of the fridge and add about half of it to the food processor. Pulse it a few times to get the butter mixed in, then add the other half of the butter. Pulse the butter into the flour until it resembles little pieces of grated cheese. Now remove the lid of the food processor and sprinkle on the vodka, and the apple cider vinegar, plus 2 Tablespoons of ice water. Pulse it again a few times to get it mixed in. Then add 2 more tablespoons of ice water and pulse until it's blended in. The goal is to work the dough as little as possible, so just pulse it as few times as needed to get it to be mixed together. Only add enough water to get the dough to stick together. Add as little as possible. Remove the lid of the food processor and pinch it together to see if it sticks together. If it needs more water, if it's not sticking together, add a tablespoon at a time, pulse, then check it again.

When it's ready, dump out the contents onto a work surface such as a big cutting board. Form it into a flat disc with your hands, then cut it in half and flatten each disc, this will make it easier to roll out later. I weigh each one with a scale to make sure I've divided them in two equal portions. Wrap each disc in plastic wrap then refrigerate for at least an hour, or up to days in advance.

When ready to use the dough, remove it from the fridge for about 20 minutes, to let it get soft enough to roll. Dust the work surface and the dough with flour (or rice flour, as mentioned above.) Use a rolling pin to roll out the dough, evenly in all directions. Turn the dough a 1/4 of a turn after each roll to get it as even in all directions as possible. If it gets tacky, use a little more flour, don't let it stick to your work surface. Roll out the dough until it's about 1/8 of an inch thick.

Grease your glass pie plate (an 8 or 9 inch) with butter and place the rolled out dough in the plate. It should hang over at least a 1/2 inch, if it hangs out more than that, cut it to 1/2 inch overhang. Fill the pie and bake as directed in your recipe.

*This is an important step* After you've filled your pie, you need to tuck the top crust under the bottom crust, then crimp together. Make sure the crust is not hanging over the edge. Make sure after you have crimped it together that it is inside the pie plate. When the crust bakes, if it's hanging over the edge, it will fall down over the edge of the pie plate and hang over. If making a fruit pie, make sure the edges are sealed, so the juices don't go running out of the edge. Make sure you cut vent holes on the top.

If you are making a single crust pie, just make sure when you crimp the edges so that they stay inside the pie plate, not hanging over the edge.

To blind bake for a single crust pie: Line the dough with parchment paper and fill with pie weights, raw rice, or dried beans. Bake in a preheated 425 degrees F oven for 10 to 12 minutes, remove the parchment and beans and bake for 2 to 3 minutes more. Remove the pie shell from the oven and cool. The dough should be golden and crisp. Continue with desired filling.


I hope you love this recipe as much as I do!
Happy Baking!

Wednesday, November 14, 2012

Easy No Crust Cranberry Pie


“At times our own light goes out and is rekindled by a spark from another person. Each of us has cause to think with deep gratitude of those who have lighted the flame within us.”
 
- Albert Schweitzer 
 
 
Whoever invented the phrase, easy as pie, was talking about this cranberry pie.  When I first saw this recipe, I thought that's probably really good (lots of good reviews) or it's just meh. Well, I'm happy to report it is the former.
 
 
Chopping the walnuts, this is the most work I had to do for this pie
 
It's really tasty, and it's one of the easiest things I've ever made. Seriously, chopping nuts and melting the butter was all the work I did, (if you call that work.) You really just stir it all together. You don't even have to thaw the cranberries. A cinch, this pie is.
 
I'm not even a huge cranberry fan, I mean they're o.k., just not exactly my favorite. But I really enjoyed this pie. So much that I ended up eating it for breakfast everyday till it was gone. (I have a sweet tooth, what can I say.)


Cranberries (frozen is fine) and walnuts go in the dry mixture to coat them before adding the wet ingredients

Of course it's not exactly a pie. Sort of like a cross between a pie and a cake and perhaps a skillet cookie. Or maybe like a cranberry clafoutis. The texture is like moist dense cake. I love the crunch that the walnuts provide. The cranberries make it tart, but the cake is sweet, but not too much so. I found if wonderfully well balanced. It's great with vanilla ice cream or whipped cream.


Spread it in the pan, (the mixture is thick) mine is so yellow because I have my own free range chickens that produce eggs with bright orange yolks. If you use store bought eggs it will be more pale.

The original recipe calls for almond extract. I couldn't believe I looked into the pantry and didn't have any. I used vanilla. Next time I may use almonds instead of walnuts, and use that almond extract and a little vanilla extract. I happen to like the flavor of almond extract, but I know lots of people don't. If you are one of those people just stick with vanilla.


Add cranberries to the top to make it look pretty

I'll be honest some of the reviews I read said they thought this was more like a breakfast cake, maybe a coffee cake. But many desserts are good for breakfast, and I think this is one of them. In my opinion I think it's more of a dessert.

At the holidays I think it would be a great change of pace to have this along with the usual pumpkin and apple desserts. I personally make 3 desserts for Thanksgiving and I think this would be a nice, different option. It's so easy, you could make it for a wonderful fall dessert with a weeknight meal as a delightful surprise for your family.


Sprinkle on some crunchy sugar, it's not necessary, but I really loved the sweet crunch on top.


I'm hosting a giveaway for a $50.00 gift certificate at my Etsy shop, House of Lucien. Head over to Shabby Art Boutique to enter! The giveaway ends Saturday November 17th. And stick around, Kerry Anne is having "Simply Christmas" going on until December 25th.

House of Lucien is now on Facebook! At House of Lucien you'll find vintage dishes, pretty teacups and teapots, silver serving pieces and more. Shabby chic to traditional. English transferware and ironstone. I ship worldwide and offer free gift wrapping. Over at House of Lucien's Facebook, everyday I feature an item with a quote called, Today's Treasure. I'd love to see you there!


Easy No Crust Cranberry Pie

adapted from Crustless Cranberry Pie from All Recipes

If you want to do the almond variation, use sliced almonds instead of walnuts, and use 1/2 tsp. almond extract and 1/2 tsp. vanilla extract.

Ingredients

1 cup (150 g.) flour

1 cup (200 g.) sugar

1/4 tsp. salt

1/2 cup (50 g.) chopped walnuts

1 1/2 cups cranberries (135 g.) plus 1/2 cup (45 g.) for topping - frozen is fine

1/2 cup (114 g.) melted butter

2 eggs, beaten

1 tsp. vanilla extract

Coarse sugar - a few tablespoons for sprinkling on top of pie - optional, but a nice touch

Directions

Preheat the oven to 350 degrees Fahrenheit, 180 degrees Celsius, Gas Mark 4. Grease or spray a 9 or 10 inch pie plate (mine was 10, if you use a 9 inch your pie will be a little taller than mine, FYI.)

Whisk together the flour, sugar and salt. Stir in the 1 1/2 cups (135 g.) of cranberries, and the chopped walnuts ( or almonds if using) and toss to coat. Stir in the melted butter, the beaten eggs and the vanilla extract (or almond and vanilla, if using.) If you are using frozen cranberries the mixture will be thick. Spread the batter in the prepared pan. Place the 1/2 cup cranberries on top of pie, well spaced to look decorative. Sprinkle the coarse sugar on top of the pie.

Bake in preheated oven for about 40 minutes, or until a toothpick comes out clean in the middle. Serve with whipped cream or ice cream if desired.