Showing posts with label cookies. Show all posts

Tuesday, December 18, 2012

White Chocolate Cherry Shortbread


"As we struggle with shopping lists and invitations, compounded by December's bad weather, it is good to be reminded that there are people in our lives who are worth this aggravation, and people to whom we are worth the same."
 - Donald E. Westlake


Christmas day is in a week! Time goes by so fast. Especially as I get older. I want to stop and cherish the moments. I mean it is the most wonderful time of the year!


Chopping the cherries
 
I wanted to make some Christmas cookies. Usually this time of year I'm baking up a storm! Not exactly what it's been like this year. I've been sick, the dogs have been sick. And when I'm not feeling good it all backs up. The dishes, the laundry, you know what I mean.


Cut up the butter and add it to the dry ingredients
 
So these cookies that I wanted to make, well they had to be good, since I wasn't exactly going to make more cookies soon.
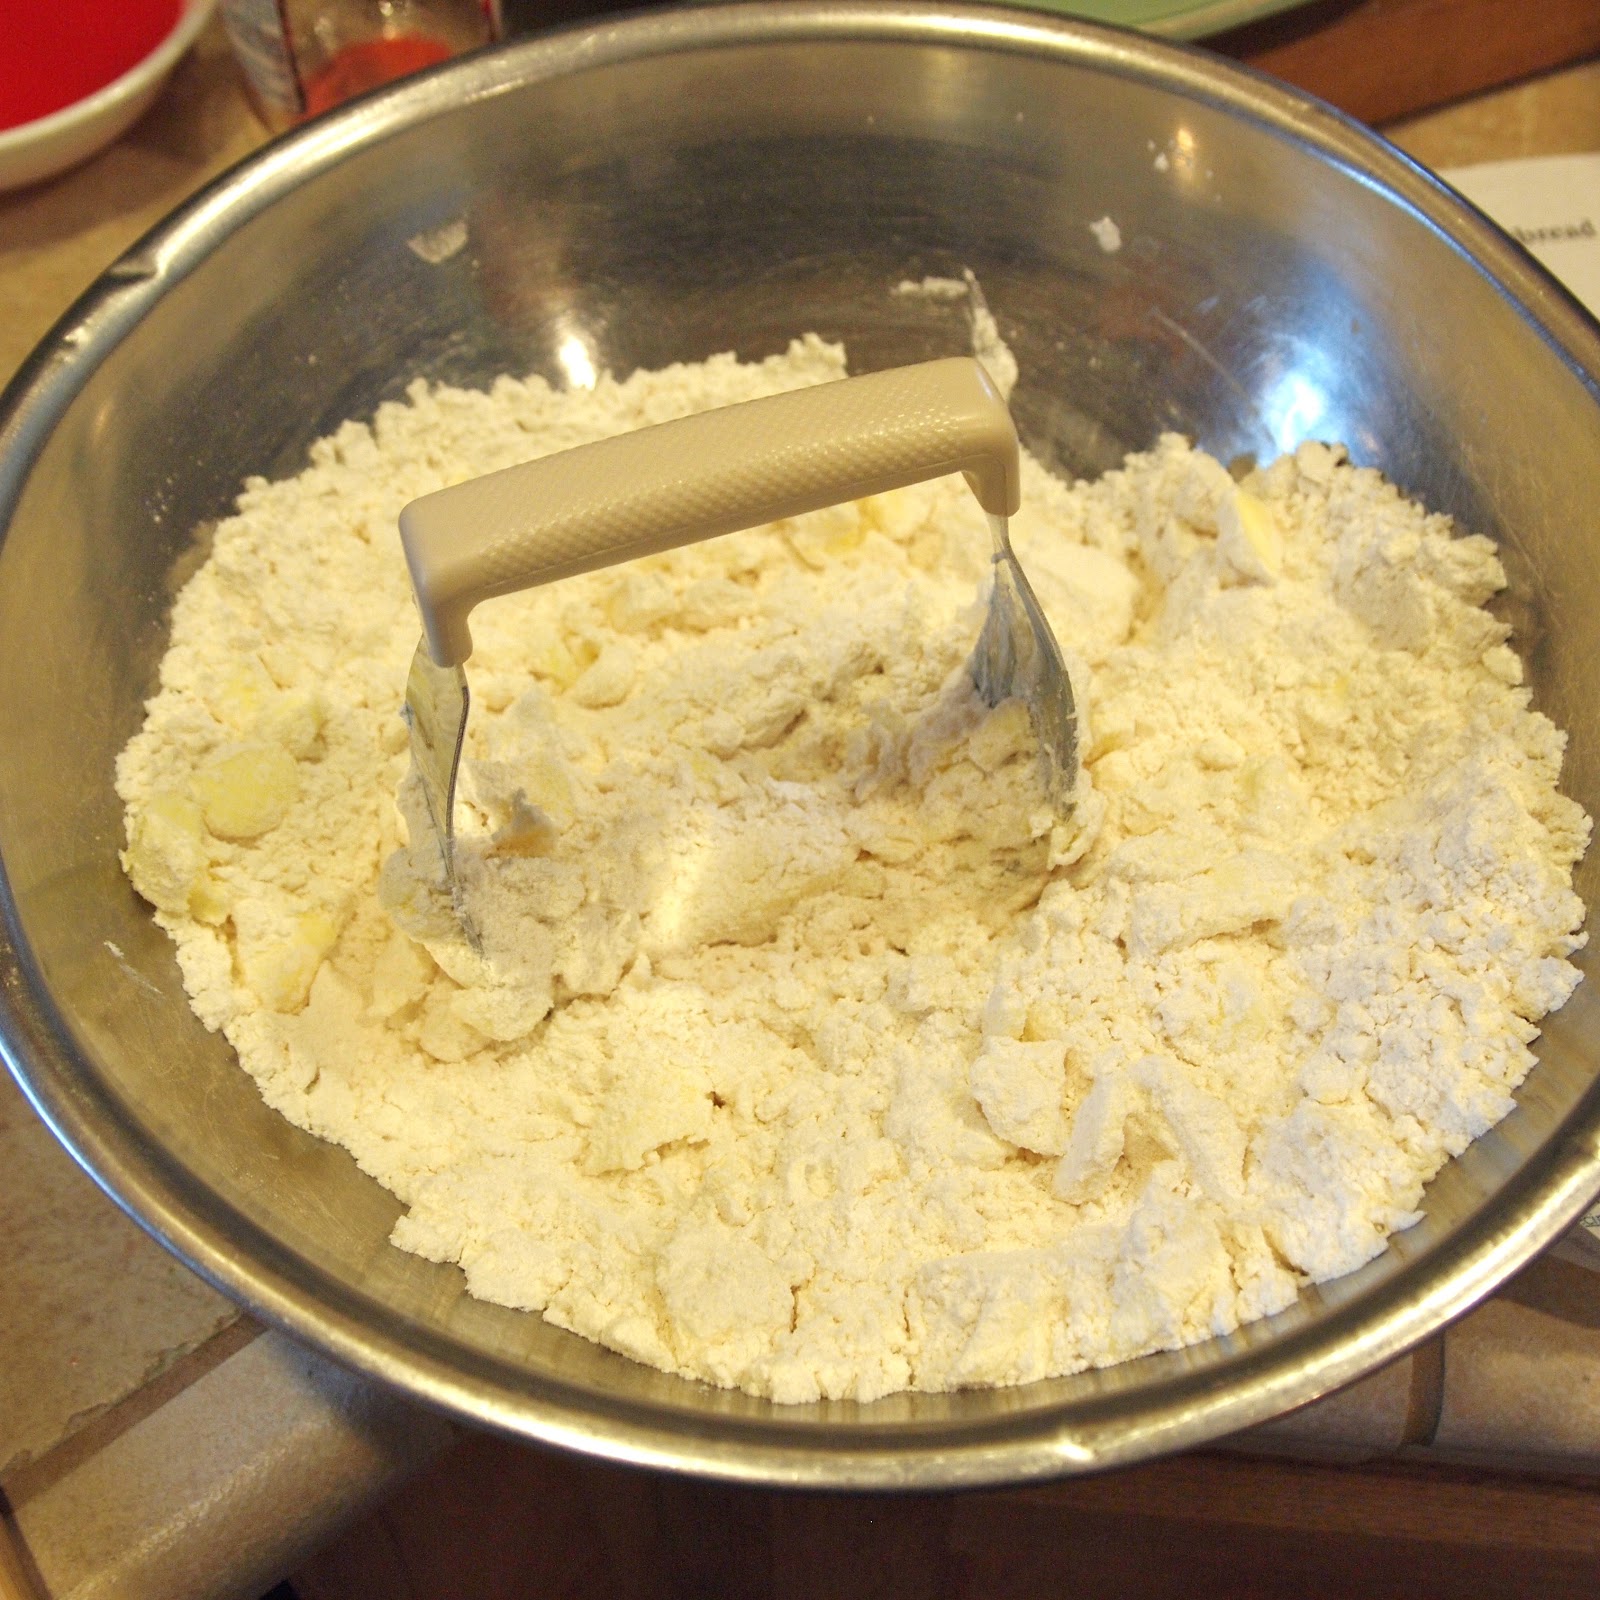
 

Cut it into the dry ingredients with a pastry blender until the butter is like fine crumbs. You could also do this in a food processor.
 
I'm so glad I made these. I love, love, love maraschino cherries. Once I open a jar, it's like my arm is uncontrollable, I need to eat one after the other. Thankfully I purchased 2 jars, but only needed one.
 

That's maraschino cherry juice on the left, I added a few Tablespoons of the juice to my cookies.
 
 I love white chocolate and shortbread too, so come on! I was all over this recipe.


Knead the mixture and form into a ball
 
These cookies turned out delicious! My husband who isn't even a white chocolate fan, said, "those cookies are really good!" (High praise from someone who doesn't love sweets.)
 
There is white chocolate in the cookies themselves, as well as being dipped in the white chocolate. You don't really need to dip them into white chocolate if you don't want to. I think it makes them more pretty. The cookies that aren't dipped, aren't too sweet which is nice.
 

Roll up a dough ball, then press it down with the bottom of a glass dipped in sugar

 
These really are a great Christmas time cookie. I love that they are sort of pink. I added to the pink-ness by adding pink sprinkles. So they're festive, pretty, and super yummy! I think these would be the star at a cookie party! Santa would love them too, I just know it!


Right out of the oven

 
I hope you and your family are having a fabulous Christmas season!


After I dipped them in white chocolate and sprinkled them with pink sprinkles!


"Blessed is the season which engages the whole world in a conspiracy of love."
 
- Hamilton Wright Mabie


I link up with these great parties!


White Chocolate Cherry Shortbread

adapted from Better Homes and Gardens

Ingredients

1/2 cup (3 1/4 oz or 91 g. weighed after draining) maraschino cherries, drained and finely chopped - but save the cherry liquid!
 
2 1/2 cups (375 g.) all-purpose flour

 
1/2 cup (100 g.) sugar
 
1/2 tsp. salt
 
1 cup (2 sticks) or (228 g.) cold unsalted butter, (or if using salted, reduce the salt amount to 1/4 tsp)

12 ounces (340 g.) white chocolate baking squares with cocoa butter, finely chopped

 
1/2 teaspoon almond extract
 
1 -2 Tablespoons of reserved maraschino cherry liquid

 
White nonpareils and/or edible glitter (optional)
 
 
Directions
 
Preheat oven to 325 degrees Fahrenheit,  160/170 degrees Celsius, Gas Mark 3.
 
Spread cherries on paper towels to drain well.
 
In a large bowl, whisk together the flour, salt and sugar. Cut the butter into pieces (around 2 Tablespoon size) and add it to the dry ingredients. Using a pastry blender, cut in the butter until mixture resembles fine crumbs. Stir in drained, chopped cherries and 4 ounces (114 g.) (2/3 cup) of the chopped chocolate. Stir in almond extract and, 1 -2 Tablespoons of the cherry juice. Knead mixture until it forms a smooth ball. It will seem too dry, but the more you knead it, it will come together.
 
Shape dough into about 1 -1 1/2 inch balls. Place balls 2 inches apart on a baking sheet lined with a silicone liner (like a Silpat), or lined with parchment paper. Using the bottom of a drinking glass dipped in sugar, flatten balls to 3 inch rounds. Bake in preheated oven for 12- 15 minutes or until centers are set. Cool for 5 minutes on cookie sheet. Transfer cookies to a wire rack and let cool.
 
Melt the white chocolate according to package directions.  Dip half of each cookie into chocolate, allowing excess to drip off. If desired, add some sprinkles. Place cookies on waxed paper or parchment, or a silicone baking sheet until chocolate is set. Makes about 3 dozen.
 
To store:
Layer cookies between waxed paper in an airtight container; cover. Store at room temperature for up to 3 days or freeze for up to 3 months.

 

Monday, December 3, 2012

Gingerbread Cookie Gift Tags


"Gifts of time and love are surely the basic ingredients of a truly merry Christmas." 

~Peg Bracken


Hey everyone! Look I have a shiny new blog! Thanks to Rekita from A Lovely Army Wife, her business is called Designed Lovely Studio where she does awesome things with blogs like she did with mine! I highly reccomend her, if you need a new look like I did.
I'm loving these gingerbread cookie tags! They taste great, full of ginger and spice, and who doesn't want a little cookie with their gift?


These cookies have a good amount of spice, if you are making them for children, you may want to reduce the amounts a little.

These can be used as a gift tag with an initial like I've done, or you can write out names on them with the icing. These can even be used as Christmas tree ornaments. (I wouldn't eat them after that, since I've made these prior to Thanksgiving, but if it was a week before Christmas, I might eat them, even if they are slightly stale from sitting out.)


Spray the measuring cup with nonstick spray before pouring in the molasses so it slides right out. This recipe calls for 3/4 a cup plus 2 Tablespoons of molasses, I just eyeballed it in this one cup measure.


But yes, these are totally edible. Keep them in an airtight container until you wrap the gift.


Adding the flour

The dough is easy to work with. Just use two sheets of parchment to roll out the dough, so it doesn't stick. You can't use too much flour when rolling these out, since you don't want them to turn out white.


The dough is sort of stiff, not too bad. It's easy to work with. Here I'm dividing the dough into thirds to wrap in plastic and let chill for an hour.

Cut a hole out to put a ribbon through, with either a straw or the end of a pastry tip.

 Roll the dough out quite thin, 1/8th of an inch. This isn't super easy to do, especially between parchment. Some of mine are sort of thick. No problem, if yours are thicker you need to just make sure your hole is big enough, so when they bake the hole doesn't close up.


Rolling out the dough between 2 pieces of parchment paper

Put the cookies on a parchment paper (or Silpat) lined baking sheet. Then place a second piece of parchment on the unbaked cookies with another baking sheet on top of that before going in the oven so cookies stay flat while baking.


Cut out whatever shapes you want, initials, here I did a star with an initial inside. My alphabet cookie cutters are sort of big, so to do a cutout like this, I needed to make the outside shape pretty large.

These cookies are crisp, they are meant to be. I tried to under cook my cookies slightly to make them soft. Why not? What could be the problem with that, you say? Well, with my softer cookies I had a hard time stringing a ribbon through them, I had a few break. The softer cookies are just more delicate. So crispy are better and easier to work with.

If you are using thick ribbon for wrapping, it's so much easier to attach the cookies with a small piece of wire, or a small ribbon attached to the thick ribbon. It's a chore to get thick ribbon through the hole and not have a break.


Cut a hole for stringing on top with a straw or a pastry tip if you have one. A number 12 worked the best for me, some of these have a smaller hole. Ready for the oven.

Wrap up the gift, attach the gingerbread to ribbon, and watch everyone smile when they receive their special gift.
Happy Holidays!  I wish you a beautiful and joy filled season!


Right out of the oven


Sprinkling the frosted cookies with edible glitter. Use a toothpick to keep the hole clear.


Frosted and decorated, waiting to dry


Gingerbread Gift Tags


adapted from Martha Stewart Living

makes 30-40 gift tags, you can easily halve the recipe if you want to make less


Gingerbread Ingredients

1 cup (2 sticks) (228 g.) unsalted butter

1 cup (200 g.) dark brown sugar, packed

1 1/2 Tablespoons Ground Ginger

1 1/2 Tablespoons Cinnamon

1 tsp. cloves

1 tsp. allspice

1 1/2 tsp. salt

2 eggs

3/4 cup (177 ml) plus 2 Tablespoons molasses - I used a 1 cup measure and eyeballed it

6 cups (900 g.) all purpose flour


Frosting Ingredients

2 cups (200 g.) sifted powdered sugar

1 tablespoon milk (adding in more if needed for proper spreading consistency)

1/2 teaspoon vanilla extract - use clear vanilla (or omit it) if you want the icing to be totally white, regular vanilla will make it beige, or you can use lemon juice to give it a little lemon flavor.

sprinkles or other decorations for topping

Directions for cookies

In the bowl of an electric mixer, use the paddle attachment to cream the butter and brown sugar until the mixture is fluffy. Mix in the spices and salt. Beat in the eggs and molasses, making sure to scrape down the bowl as needed.

Add flour and mix on low speed to combine. Divide dough into thirds, press to flatten and wrap in plastic. Place in fridge and let chill for an hour.

Heat oven to 350 degrees Fahrenheit, 180 degrees Celsius, Gas Mark 4. Lightly flour 2 pieces of parchment paper. Roll out the first piece of dough to 1/8 an inch between the two pieces of parchment. Use cookie cutters to cut into desired shapes. Initials, or a large cookie with an initial cut out of the middle. Or any shape you want! Cut a hole for hanging with a straw, or a size 10 or 12 pastry tip. Using a spatula, carefully transfer cookies to parchment lined, or Silpat lined, baking sheet. Cover cookies with parchment paper then top it with a second baking sheet to keep cookies flat while baking. Bake until lightly browned, about 15 minutes. Keep the baking sheet on top for about 20 minutes while cooling. Let the cookies cool completely before frosting. Frost with the frosting recipe provided if desired. Keep cooled cookies (if frosted make sure they are totally dry, overnight is good) in an airtight container before using.

Frosting Directions

In a medium bowl, mix the powdered sugar with milk (start with 1-2 tablespoons, you will likely need more milk for the perfect spreading consistency). If you are adding sprinkles or other decorations, put them on right after frosting the cookies. Then let dry completely before using.

If you want to write names on the cookies, tint the frosting to desired color, use a pastry bag and writing tip, or put frosting into a small baggie and cut a small hole in the corner for writing. If you are writing on a cookie that has been frosted already, make sure that frosting has dried first.
 Photobucket

Tuesday, December 20, 2011

Triple Ginger Cookies


"For centuries men have kept an appointment with Christmas. Christmas means fellowship, feasting, giving and receiving, a time of good cheer, home."

~W.J. Ronald Tucker


Happy Holidays! I hope you all are having a great time preparing and celebrating the holidays no matter which one you celebrate.

I want to apologize for my absence from this blog. I appreciate your support and for reading, even though I don't always update as much as I'd like. December 11 was my birthday and my family came to visit to help me celebrate, we had a great time. After their departure I haven't been feeling well. I haven't done my usual making candy and baking that I usually do this time of year. Ah, such is life. Doesn't always go as planned.

Also I had that thing happen with my email account where it looked like I sent out spam. Sorry if I sent you spam. I promise it wasn't me, just a bot/virus thing that I think I've fixed now.

If you aren't finished with your holiday baking or edible gift making I have lots of ideas in the sidebar that I've also included below.

Homemade Food Gifts

Meyer Lemon Marmalade

Savory Rosemary Shortbread

Savory Aged Cheddar Shortbread

White Walnut Fudge

Salted Caramels

Wine Jelly

Chocolate Almond Butter Toffee

Street Fair Cinnamon Almonds

Caramel Corn Clusters

Pepper Jelly

Homemade Blackberry Liqueur

Satsuma Mandarin Marmalade

I wanted to share this recipe for my favorite ginger cookies. I love them and I think you will too. they come from a number of trials to find the perfect ginger cookie. The writing below is from a post I made on another blog this time last year.

If there could be a perfect ginger cookie, I'm convinced these chewy morsels could be it. What sets this recipe apart from all others is that it contains 3 types of ginger. This provides a layering of multidimensional ginger flavor. And the crystallized ginger really adds a spicy element. If you'd like to kick the spiciness up a bit, then add a pinch of cayenne pepper. I did to one batch and I loved it. It may not be for everyone, but it adds a special spicy dimension that you can't really put your finger on. If you're skeptical, make the dough, and add a small pinch to only a portion of the dough so you can try it.


Triple Ginger Cookies

Ingredients

2 cups (200 g,) all purpose flour
2 1/2 teaspoons ground ginger
2 teaspoons baking soda
1 1/2 teaspoon ground cinnamon
1/2 teaspoon ground cloves
pinch of cayenne pepper (optional)
3/4 teaspoon salt
1-2 inch knob fresh ginger, (or 2-3 Tablespoons) peeled and grated*
3/4 -1 cup chopped crystallized ginger
1 cup (packed) (150 g.) brown sugar
1/2 cup (113 g.) vegetable shortening room temperature, or substitute more butter
1/4 cup (1/2 stick) (56 g.) unsalted butter, room temperature
1 large egg
1/4 cup mild flavored (light) molasses

raw turbinado sugar, or granulated sugar for rolling

Directions

 
 Combine first 7 ingredients, (8 if using the cayenne) in medium bowl; whisk to blend. Mix in crystallized ginger. Using electric mixer, beat brown sugar, shortening and butter in large bowl until fluffy. Add egg and molasses and beat until blended. Add flour mixture and mix just until blended. Cover and refrigerate 1 hour.
Preheat oven to 350° degrees Fahrenheit, 180 degrees Celsius, or Gas Mark 4. Cover 2 cookie sheets with parchment paper, or lightly butter them. Spoon sugar in thick layer onto small plate. Using wet hands, form dough into 1 1/4-inch balls; roll in sugar to coat completely. Place balls on prepared sheets, spacing 2 inches apart.

Bake cookies until cracked on top but still soft to touch, about 12 minutes. Cool on sheets 1 minute. Carefully transfer to racks and cool. (Store cookies in airtight container at room temperature.)

*The easiest way to grate fresh ginger is to freeze it first, then peel, then grate it with a microplane or a box grater using the fine holes.

Sunday, September 25, 2011

Blue Ribbon Snickerdoodles


"Think what a better world it would be if we all, the whole world, had cookies and milk about three o'clock every afternoon and then lay down on our blankets for a nap."

-Robert Fulghum


These Snickerdoodles earned me the coveted title "Best Cookie Baker of Thurston County." Here's how it went. 

The night before we decided to go to the fair, at approximately 9 pm, I looked at their website to see what was going on that day. Turns out they were having a different baking contest each day (apart from the entries displayed at the fair.) The day in question was cookies, the day after chocolate cake and so on. The cookie contest stated that the winner will be named "The Best Cookie Baker of Thurston County." It also mentioned that if you bring a plate of cookies to enter you get into the fair for free. I like free stuff, so I went to the kitchen, revved up the oven and got to work.


It was all so last minute, that's why no pictures of cookies, only fair animals. The one picture of cookies (above) I took after the fact with the remaining cookies at home.


What type of cookies should I bake? I thought. I went through a list of possibilities in my head. Chocolate chip? Too boring. Chocolate chocolate chip? Too rich, not everyone likes rich. Lemon? Not everyone likes lemon. And so on.

Snickerdoodles were it. Most people like cinnamon, sugar and butter. Remember when they did the study where they found out that men prefer the scent of cinnamon rolls baking over any other scent? I rest my case.

Not to mention I've heard these cookies described as "crack cookies." Due to their addictive qualities.


What a bunch of lazy pigs

As you already know, I won! First place! I not only got into the fair for free, I won this lovely blue ribbon, a $25.00 dollar gift certificate to a local restaurant and of course the title of The Best Cookie Baker of Thurston County.

This is a recipe I've tweaked over the years to adapt to my taste, and not to mention blue ribbon status. Crisp on the outside and chewy and soft on the inside. I like to use half butter and half butter flavored Crisco because Crisco gives them a more crisp exterior than using all butter. (Butter has 14%-18% water, Crisco is pretty much solid fat) If you prefer, you may substitute more butter for the Crisco but they won't be as crisp.


Blue Ribbon Snickerdoodles

this recipe was created by me, Melissa Graham aka The Alchemist

Ingredients

1/2 cup butter (1 stick) (113 g.), softened
1/2 cup (113 g.) Butter Flavored Crisco
1 1/2 cups (300 g.) white sugar
2 eggs
1 Tablespoon vanilla extract
1 teaspoon butter flavored extract-optional-I have this ingredient in the house so I use it to boost the butter flavor, but if I didn't already have it I don't think I'd buy it just for this. (But I did use it in the winning cookies. FYI.)
3 1/2 cups (525 g.) all-purpose flour
2 teaspoons cream of tartar
1 teaspoon baking soda
1/2 teaspoon salt

Cinnamon and sugar mixed together for rolling cookies

Directions

Preheat oven to 400 degrees Fahrenheit, 200 degrees Celsius, or Gas Mark 6.

Cream together the butter and butter flavored Crisco till fluffy. Add the sugar and beat again for about 2 minutes until really light and fluffy. Now add the eggs, vanilla and butter extract (if using) and beat well for about a minute. Scrape down the bowl with a rubber scraper/spatula and then beat again for another minute.

In a separate bowl add the flour, baking soda, salt and cream of tartar. Whisk together to blend.
Add the dry ingredients to the wet and beat till all is incorporated.

Line a baking sheet with parchment paper. Scoop out dough using a 2 teaspoon size disher. Roll cookies in cinnamon/sugar mixture.

Bake on prepared sheet for about 9 minutes. In my oven after exactly 9 minutes they are perfect. This is 2 teaspoon (or slightly larger) size. Don't over bake! If you eat a hot cookie (I mean who doesn't want to eat a hot cookie?) when it's warm, it might seem doughy or under baked. But if you take that same cookie and put it in the fridge (or wait till it's cooled at room temperature) it will harden a bit and be a delightfully soft cookie. So don't determine the baking time by eating a hot cookie. The cookies should be soft on the inside and crisp on the outside.

After they come out of the oven place the baking sheet on a wire rack for just 2 minutes, then remove cookies from the baking sheet with a spatula to wire racks to cool completely.

Makes about 3 dozen cookies.

Sunday, June 26, 2011

Chocolate Whoopie Pies With Salted Caramel Buttercream


"Of all the wonders of nature, a tree in summer is perhaps the most remarkable; with the possible exception of a moose singing "Embraceable You" in spats."

- Woody Allen


Hey everybody! It's summer!  I enjoy the sun so much more when it isn't around all the time. When I lived in Southern California where it's sunny everyday, I took it for granted. I was always longing for a climate that had different seasons. Now I've got that here in Washington, and I do enjoy that difference. Summer is a season I particularly enjoy.

I've been spending my days out in the garden. I grow vegetables and herbs. We also have roses and fruit trees. I'm growing nasturtiums as well since they are easy to grow and edible. Heck we have so many things growing it's hard to keep track. We live on 10 acres, which is great, but also, work.

The pies call for buttermilk, I like to use this Bulgarian Buttermilk in mine. It's higher in fat than most buttermilk, so it makes for a rich end result.

Yes, I've been busy, but never too busy for baking. These whoopie pies are one of my favorite things in the world. A sure thing. A dessert I bring to parties when I want to please everyone. They are fun and tasty enough for children, but with a slight sophistication from the hint of salt in the buttercream, for the adults. I just love them. The cakes are soft and full of rich chocolate flavor, and the salted caramel buttercream is absolutely divine. A go to frosting of mine.


They are simple to make as well. The cake portion is quite straight forward.

The caramel buttercream also simple. A standard American buttercream essentially, with caramel mixed in.  I know, I know, most people don't consider making caramel of any kind, simple. But trust me. I've taken pictures of all the steps the caramel goes through, to make it as easy as well, pie. It doesn't even require a thermometer.


The secret to making caramel is the secret to most everything in life.

 Which is really paying attention and being present.


Some Dont's when making the caramel.

Don't walk away while it's on the stove.
Don't try to rush it.
Don't do other things while making it. (It only takes 10 minutes or so.)

If you follow these simple steps when making this recipe, you will be richly rewarded, my friend.


Chocolate Whoopie Pies with Salted Caramel Buttercream

makes 24 pies

Recipe for pies inspired by this recipe on Epicurious

Salted Caramel Buttercream recipe is my own.


Start the buttercream first. (Recipe for pies is after the buttercream recipe, below.)


Salted Caramel Buttercream

makes enough to fill 24 pies, or frost about 24 cupcakes


Ingredients

1 cup (200 g.) granulated sugar
2/3 cup (160 ml) water
1 cup (240 ml) heavy cream
2 tsp. vanilla extract
3 sticks (339 g.) unsalted butter- or if you use salted, just cut back on the salt, (below)
1-2 tsp. fine sea salt
2 cups (230 g.) powdered sugar

Instructions

First, get your mise en place ready for the caramel, it will go fast. Measure the cream in a slightly larger vessel than needed. Add the vanilla to it, and place it next to the stove.

In a saucepan where you can see the bottom, like stainless steel, (I used an off white color Le Cruset pan.)
This is important because you will make decisions based on it's color. So if you use a black pan for example, it will be harder to see the color. (I've done it, it is possible, but I don't recommend it.)

Over medium high heat, stir together the granulated sugar and the water. Stop stirring after the sugar has dissolved. Bring to a boil over medium high heat.


This is just the sugar and the water boiling at the start. It's clear now.

Pull up a chair, you're going to sit and watch this for about 6-8 minutes, till it turns light golden, (below.)
During this time, don't stir it. Right when it gets to this point, remove it from the heat. You can swirl the pan a little if you feel like you can't see the color well. You must, I repeat, you must catch it right at this point. If you let it go any longer, it will turn to black in what feels like an instant.


This is the color you want. Remove it from the heat now.


I took this picture about 5 seconds after the picture above, after I removed it from the heat, to illustrate how much darker it turned in such a short time.


As soon as you remove it from the heat, add the cream/vanilla mixture and stir. It will boil and sputter up. (is that a word?) The sugar will turn to a hard rock, basically. You will feel like you have done something wrong. You haven't.

After adding the cream and vanilla, the sugar turns into a hard ball. It's o.k. it will dissolve.

Continue stirring until the sugar dissolves and becomes homogeneous with the cream. If you feel like it's not happening fast enough, go ahead and put the pan on low heat to help it along.


After stirring for a few moments, it's on it's way to becoming homogeneous.


Here it is when it's finished, it just need to cool.


But wait, it's not quite done. Strain it first to make sure you don't have any bits of sugar that didn't dissolve.

Using a fine mesh strainer placed over a heat proof bowl, pour in the caramel to remove any bits of sugar remaining.

Set it aside to cool while you start on the pies.

Set the caramel aside until it's cool to the touch. About 1 1/2- 2 hours. You can also make this part the night before, and let it cool overnight.

While it's cooling, start making the pies. (recipe below.)


In the bowl of a stand mixer, (or a large bowl with a handheld) mix the butter and salt (start with 1 tsp., add more later when finished to taste) on medium high speed until very light and fluffy. About 4 minutes.

Add the caramel. Beat well. Scrape down the sides of the bowl with a rubber spatula. Then mix again. Add the powdered sugar and mix very well, until very light and fluffy, about 4 minutes. Taste it and see if it needs more salt for your taste. 

At this point it should be a good consistency for the whoopie pies. If you are piping the buttercream onto cupcakes, you may want it a bit firmer. If you do, just refrigerate it for 30 minutes to an hour and proceed.


For The Pies

Ingredients

4 cups (601 g.) all-purpose flour
1 cup (114 g.) Dutch-process or natural cocoa powder (my favorite cocoa is natural high fat cocoa from Penzeys, it gives these cakes a rich chocolate flavor)
2 1/2 teaspoons baking soda
2 teaspoon salt
2 cups (480 ml) well-shaken buttermilk
3 teaspoons vanilla
2 sticks (1 cup) (227 g.) unsalted butter, softened
2 cups (300 g.) packed brown sugar
2 large eggs

Directions

 Preheat oven to 350 degrees Fahrenheit, 180 degrees Celsius, or Gas Mark 4.

Whisk together flour, cocoa, baking soda, and salt in a bowl until combined. Stir together buttermilk and vanilla in a small bowl.

Beat together butter and brown sugar in a large bowl with an electric mixer at medium-high speed until pale and fluffy, about 3 minutes in a standing mixer or 5 minutes with a handheld, then add eggs, beating until combined well. Reduce speed to low and alternately mix in flour mixture and buttermilk in batches, beginning and ending with flour, scraping down side of bowl occasionally, and mixing until smooth.

With a 2 Tablespoon size disher, scoop batter onto parchment lined or Silpat lined baking sheets, leaving 2 inches of space between each cookie. Put your clean hand under the faucet and get it wet. Gently pat the mounds down a little to prevent them from being too round on top.


Bake in upper and lower thirds of oven, switching position of sheets halfway through baking, for about 10 minutes. They are done when tops are puffed and cakes spring back when touched. Don't overbake.


Transfer with a metal spatula to a rack to cool completely.

When cool add about a Tablespoon of buttercream to the middle of one of the cookies, and place another on top to make a sandwich. If not serving them right away, place them in an airtight container.