Saturday, August 25, 2012

Tortellini Salad

 
"The intuitive mind is a sacred gift and the rational mind is a faithful servant. We have created a society that honors the servant and has forgotten the gift."
 
~ Albert Einstein


O.K. so it's August 25th. August to me means summer. We have one whole week left of it. Everywhere around me I see pumpkins, and apple pies and Halloween. But hey, it's not really fall yet. I want to say, "take it easy, fall will come soon enough." I'm working on being present, so here now in the moment, it's summer and I want to enjoy it till I can't anymore.
 

I purchased this fresh cheese tortellini at Trader Joe's for about the same price as dried. I liked it.


So, you know, since it is summer, I bring you a great summer salad. Easy to make and full of awesome stuff most people love.
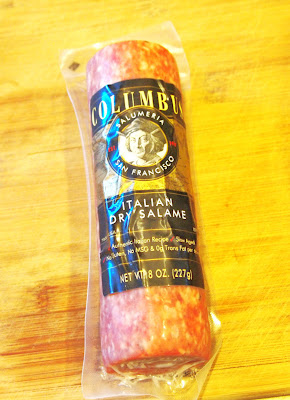

I bought my salami at Trader Joe's too, then cut it in chunks.


I used salami but you can easily leave it out if you have any vegetarians. This salad also has fresh spinach cut into slivers so it sort of disappears when it's tossed with the other ingredients and the dressing. The fresh basil and tomatoes add a burst of freshness.


It's so easy to make too! Just throw it all together. The most difficult thing to do is cook the tortellini and chop a little veg.

May you enjoy these last days of summer, whatever you do. Weather it's eating a cold salad, or enjoying a warm pumpkin pie.


Tortellini Salad


This is an original recipe by me, Melissa, The Alchemist


Ingredients

2 -  9 or 10 oz packages of fresh or dried cheese tortellini - Cooked according to package directions, rinsed and cooled slightly.

A bunch of fresh spinach - about a bag of it. I used some from Paradise Organics fresh picked from the farm, so I didn't measure it.

2/3 cup fresh grated Parmesan cheese - or a little more to taste -sorry I didn't weigh this! About a handful.

A dry pint (2 cups) (170 g.) of cherry tomatoes - washed and halved

2 - 2 oz. (a total of 117 g.) cans sliced black olives, drained

8 oz. (227 g.) salami or pepperoni, diced in bite sized chunks

Fresh basil - washed and cut into slivers - to taste, about a small handful of leaves

Italian Salad Dressing to taste - Use something good. I used Paul Newman's Olive oil and Vinegar dressing since it's my husbands favorite - about a cup, maybe a little more, I didn't measure.

Optional -artichoke hearts would not be amiss here, but sadly, I was about to add some, from a can, I opened them and wow, they had no taste at all, so I didn't add them. Next time I might add the type that are marinated in a jar.


Directions

Wash and dry the spinach and cut it into about 1 or 2 inch slices. Add the cooked tortellini to a large bowl and all the rest of the ingredients except the salad dressing. Start with a smaller amount of spinach if you think you may have a lot. Toss it all together. Add salad dressing to coat lightly. Taste it and add salt and pepper to taste. Add more spinach if you think it needs it. If you are going to put it in the fridge for later, I'd do it now with a light coat of dressing so the flavors can marry. If you are going to eat it now, go ahead and more dressing if you think it needs it.

Monday, August 20, 2012

Frozen Hot Chocolate


"You will find as you look back on your life, that the moments when you really lived are the moments when you have done things in the spirit of love."

-Henry Drummond


I've seen versions of this drink around lately, but I saw one that required cooking then cooling, and I thought, "If I make something called, Frozen Hot Chocolate, I need to drink it now." So I created one that didn't need cooking, so you can indulge without patience. Recipe below.
 First an update of the garden. Summer won't be here for much longer, so I wanted to celebrate the abundance of nature with some photos.

Every time I see this Hydrangea in the front yard I smile because I love the color so much.


Welcome to my rose garden


This is my favorite rose, it survived the move from Los Angeles, 5 years ago where it lived on our balcony. The name is Blue Girl and it's super fragrant, which of course, I love. I've even used the rose petals in the past to make Rose Petal Jelly.


I love the color of this one.


The front porch where we have a ships bell. My husband loves to sail so it's my nod to his nautical ways.


Our green apple tree - I am so grateful! This year our apple trees have lots of fruit! I this this our best year yet for apples.


Our red apple tree


These cast iron birds live on our porch.


Pigeons that also live on our porch. (I have a thing for birds I think.)


Never miss a post! Like The Alchemist on Facebook!


Frozen Hot Chocolate

I based this recipe on Hershey's Chocolate Hot Chocolate Recipe only since I was adding ice, some of the milk portion would be water. So I added some heavy cream for, what else? Creaminess. If you make the entire thing with half and half or heavy cream, it will be even richer and creamier. Sort of like a milk shake. If you don't like using cream, just use all milk and know it won't be as creamy or rich.

Makes 1 serving

Ingredients
1/2 cup (118 ml) milk
1/4 cup (59 ml) heavy cream - or double cream, or half and half
3-4 teaspoons Unsweetened Cocoa powder - I used Hershey's - depending on your taste
2-3 or 4 Tablespoons sugar, depending on your taste
1/4 tsp. vanilla extract - If you don't have this, just omit it.
1 cup ice cubes (about a handful)
Whipped cream and sprinkles for topping - optional


Directions


Add the milk, heavy cream, unsweetened cocoa, sugar, vanilla and ice to a blender. Let it blend on high for about 2 minutes until the ice cubes have blended well. Taste it and see if it needs more sugar or cocoa for your taste. Top with whipped cream and sprinkles if desired. Drink immediately.

Wednesday, August 15, 2012

Cornbread Salad


"The difference in winning and losing is most often... not quitting."

-Walt Disney
 1901-1966, Animator and Film Producer


We were at the Hood River, Oregon, County Fair, when we had lunch at one of the booths, Apple Valley BBQ (also a local store and BBQ restaurant) when I first heard the words, "cornbread salad."These were one of the choices given when the girl behind the counter asked us what side we wanted with our pulled pork sandwiches. I asked her to kindly repeat herself when I heard the two words I'm not used to hearing together.


I used Jiffy cornbread mix to make it easy


"What? Cornbread salad? What the heck is that, I asked." Her reply was, "it's good." I needed no convincing.


Twinbrook Creamery milk, people, this is the best milk on the planet! If you don't live in Western Washington, I urge you to seek out a small dairy that has only Jersey cows. Jersey milk is sweeter, richer, and has a higher protein content. Go to a place like Local Harvest to find a local dairy farm that provides milk from the breed.


I tried the cornbread crumb mixture which was mixed with bacon, red bell pepper, and red onions and called salad. It was delicious, simple, homey. It was a little looser than stuffing, but not dry. Tasty stuff indeed.


I love cornbread, and I enjoyed this salad, so I wanted to make my own. One thing I couldn't figure out. What was binding it together? And was there a secret ingredient? I gathered all of my courage and proceeded back to the stand to ask for a recipe.

The man behind the booth was very kind and helpful. He told me it was his aunt's recipe. Cornbread, red bell pepper, red onions, bacon and some mayo to hold it together. That's it! Simple family recipes, My favorite.


I searched the Internet for other cornbread salad recipes, to see if I could add anything to the party. To my surprise, I found many well loved recipes. I added black beans and corn to mine, from another's suggestion. In addition to mayo, I also added some Italian salad dressing I had in the fridge for a little acid and more dimension of flavor. Some other tasty additions, green chilies and cumin. Tomatoes would also be good. Go crazy! Add what sounds good to you. I also read of a recipe where someone added pickles and pickle juice for the acid element. An interesting and tasty idea, I thought.

This is a great Summer recipe. Perfect for a picnic or potluck.


Square Vintage silver tray, Red "lobster" napkins, fleur de lis bowls, and Sheffield England Silver Spoons, available at my Etsy Shop, House of Lucien.

 
Never miss a post! Like The Alchemist on Facebook!


Cornbread Salad

adapted by a recipe from Apple Valley BBQ (If you're ever in Parkdale, Oregon, stop by for some tasty BBQ!)

I used Jiffy cornbread mix, to make it as easy on myself as possible. Next time I make it I will use my favorite cornbread recipe, Double Cornbread since cornbread is the main ingredient, you want it to be tasty. Or use your favorite cornbread recipe.

This is a rough recipe. I didn't measure when I made it, this is by memory, if you're the type that needs a more solid recipe and doesn't like to wing it, I would understand if you sought out another recipe.

Ingredients

2 boxes Jiffy cornbread mix and the ingredients to make it (4 eggs and some milk, check the box for proportions)

1 red bell pepper, chopped small

Red onion - about a half of an onion, or more to your taste, diced small

12 oz (340 g.). bacon, about 8-10 slices, cooked and chopped

1 can (15 oz.) black beans, rinsed and drained well

1 can (15 oz) corn, rinsed and drained well- or use a few ears cooked corn, cut off the cob

salt and pepper to taste

Mayonnaise - about 1/2 cup (118 ml) - 1 cup (237 ml.)

Italian salad dressing or vinaigrette - a few tablespoons to 1/4 cup (59 ml.)

Directions

Make the cornbread according to the directions on the box, except use 2 boxes and double the eggs and milk. Pour it all into a 9 inch  greased square pan as advised on the package for 1 box. It will just be a little taller. Mine took me just 10 minutes more than what was called for on the box, 30 ish minutes. When it's done, let it cool.

Crumble the cornbread into a large bowl. Stir all of the ingredients except the mayo and salad dressing together with the cornbread. Start by adding the smaller amount of mayo and a few tablespoons of Italian dressing and stir. Add more mayo and salad dressing if it needs it, tasting as you go to see what's needed. You don't want it too wet, and you don't want it too loose. Enough so it just holds together. Let it sit an hour before you serve it in the fridge to let the flavors marry.


Saturday, August 11, 2012

Plum Torte


"Nine times out of ten, when you extend your arms to someone, they will step in, because basically they need precisely what you need."

-Leo Buscaglia


I've had a hard time of it in the last week. I've struggled with chronic migraines and neck pain for many years. I don't like to dwell on it, or talk about it much. But man, sometimes it just kicks my butt. I feel much better now, but it put me out of commission for about 4 days. My doggies, Lucien and Coco, have been patient, laying with me in bed, silently wishing me well, waiting for me to feel better. Unlike their usual  2 year old personalities, who run around our house from room to room at top speed, and around the couches, and over the couches, like they are their personal obstacle course.


The plums that started it all


Before the recent incident, I purchased some fabulous plums at Paradise Organics. Those were the best plums I think I've ever had.


I remembered I had read about a purple plum torte, that was the most requested recipe and the most published recipe from the New York Times. In fact published 12 times. What? I thought. The most requested recipe? That must be some torte.

Read about it here with the Essential New York Times Cookbook from Amy Tobin.

Read about it at The Splendid Table.


The batter is thick

In the above referenced articles, the reasons are as follows:

1. Old fashioned, homey flavor.
2. Ease and speed of preparation.
3. 8 Simple ingredients that you probably already have at home. (Besides the plums.)


I made this twice. Once before the headache. Days past and I hadn't taken a good picture of it, and it got eaten, so I needed to make another one. Darn. That's the one with the halved plums, above. I made it again yesterday with sliced plums, they were the larger variety black plums. I actually liked it better with the sliced plums because it seemed like you got more fruit per bite. If you halve them, I suggest not leaving so much space between each one like I did in the one shown above.


The above torte is the after picture from the halved plum torte. Both times I made this, the fruit sank. I thought that's what was supposed to happen. But in one of the articles above, her plums look nice and pretty sitting on top! I was like, what? It's such a simple recipe I don't know what could have gone wrong. No matter, still yummy, still a great dessert. Mine just not as pretty.


This was my second time making it, and my favorite.

The torte is sweet and a bit tart from the plums (especially if you use purple plums, the small variety the recipe calls for.) The top is crisp from the sugar, the cake element gets more moist as it sits. I think it was better the next day after baking. There is a bit of cinnamon on top I was skeptical about. Now I love it. The original recipe calls for one teaspoon. I used about half, both times and was pleased with the results. Another addition I made the second time was to add vanilla extract. I've noted the changes in the recipe, below.


This is the "after" picture of the sliced plum version.


This recipe is indeed easy and simple. Really it only takes about 10 or 15 minutes to put together. You could really use any fruit, or combination of fruits. Blueberries and nectarines sound good, peaches and raspberries sound mouth watering. I think I need to make this again!


Never miss a post! Like The Alchemist on Facebook!

Plum Torte


adapted by the one from Marian Burros, Lois Levine
From The New Elegant But Easy Cookbook, by Marian Burros and Lois Levine.

As I mentioned, feel free to use whatever fruit you have on hand. Just use enough to cover the top of the batter. Peaches, apricots, even berries, or a combination are great choices.


Ingredients

1 cup (150 g.) all-purpose flour

1 teaspoon baking powder

Large pinch of salt

1 cup (200 g.) sugar

8 tablespoons (1 stick) (113 g.) unsalted butter or salted (if salted just use a smaller pinch of salt), softened

2 large eggs

1 tsp. vanilla extract

12 small purple plums, halved and pitted - Or large black plums sliced, about 4 or 5, enough slices to cover the batter generously. Or whatever fruit you'd like.

2 teaspoons fresh lemon juice, or more or less, depending on the tartness of the plums - I didn't use the lemon juice both times. I think it's optional

2 Tablespoons sugar for sprinkling on top

1/2 -1 teaspoon ground cinnamon - I used 1/2 tsp. Use to your taste. If you are using a fruit that cinnamon doesn't sound good with, then omit.
Directions

Heat the oven to 350 degrees Fahrenheit, 180 degrees Celsius, Gas Mark 4.

Sift the flour with the baking powder and salt in a medium bowl.
Cream 1 cup sugar and the butter in a large bowl with a hand mixer (or in a mixer) until light in color. Add the eggs and vanilla and mix, then add the dry ingredients and blend until incorporated.
Spoon the batter into a greased 9-inch springform pan. Cover the top of the batter with the plum halves, skin side up. Or with whatever sliced fruit you are using. Sprinkle with the remaining tablespoons of sugar and the lemon juice (if using), adjusting to the tartness of the fruit. Sprinkle with the cinnamon (if using.)
Bake until the cake is golden and the plums are bubbly, 45 to 50 minutes. Cool on a rack, then unmold.

Monday, August 6, 2012

Lavender Vodka


"If you must love your neighbor as yourself, it is at least as fair to love yourself as your neighbor."

~Nicholas de Chamfort


Time for another instalment from my Cool Stuff series where I feature stuff I love, mostly handmade, and a drink recipe! I vowed to write these every weekend, but I missed a few, so let's just say I'm going to do it whenever it happens. I don't like to make rules, or abide by them, for that matter.

I got this lavender vodka idea from Mindy at Rindy Mae in her Annual Christmas Gift Exchange post where she talks about how she made lavender infused vodka as a Christmas gift. She mentioned it in the comments of my Lavender Lemonade, and I thought, "What a great idea!" I made some, added it to the lavender lemonade, and wow, it's just heaven in a glass. Such a great drink for a hot summer night. So I made some more to take a photo of and share with you! (Since I love you so much.)  And hey, I'm going to drink it now!

Thanks for the idea, Mindy!

Recipe below, but first, here's some cool stuff.


From The Kitchen Of Personalized Labels Label your jam or homemade bread with style with these made for you labels, by Curious London


Canvas Messenger Bag, Hand Painted ..And the sign said... From the maker -"This French phrase basically translates to “No campers or nomads permitted.”When I saw a photo of this actual French sign I knew I had to paint it on a canvas bag. So here’s my tribute to all the campers, nomads and gypsies everywhere! And with this bag – you are permitted to carry it Everywhere!! "  By CLP Studio- I love it!


Iphone 4 Case-pink butterfly-sparkle case-glittery - What a pretty case for your Iphone!  by Vintage Chic Images


30 Permanent Self Adhesive Chalkboard Labels- By JS Crafty Studio - I see these all over, and every time I do, I just love them! Gotta get me some, they're so clever for jars and storage.


Vintage Map Thank You Stickers, package of 20 handwritten stickers calligraphy- by KisforCalligraphy - I love these handmade stickers, and everything else that comes from this shop! I ordered a handmade custom stamp from her, and I love it!


Vintage Liqueur Glasses available at my Etsy shop, House of Lucien.

 
Never miss a post! Like The Alchemist on Facebook!
 

You don't exactly need a recipe for infusing vodka. Add some flavored stuff to vodka (here it would be the lavender), shake it up, wait a few days, and it will be flavored. If you've never done it before maybe you might want to follow some loose guidelines, so I've provided a recipe below. When I've done this I haven't made a full bottle, I've added about a teaspoon of lavender flowers to about a cup of vodka, and shook it up whenever I thought about it, waited for 2 days and it's ready. Add it to my Lavender Lemonade and experience total bliss in a glass.


Lavender Vodka

Recipe from Just A Pinch


Ingredients


1 750 ml bottle vodka

2 Tablespoons dried lavender

Directions
Place lavender in a clean 1-quart jar. Using a wooden spoon, lightly crush lavender flowers against the side of the jar after adding vodka.
Cover jar tightly with a non metallic lid (or cover jar with plastic wrap and tightly seal with a metal lid). Let stand in the freezer for 4 days.
Pour vodka through a fine mesh sieve to remove all solids. Return infused vodka to original bottle. Or to give as a gift, pour infused vodka into a decorative jar. Label and seal. Place jar in the freezer up to 3 months to store.

Thursday, August 2, 2012

Summer Vegetable Tart


"If you hear a voice within you say 'you cannot paint,' then by all means paint, and that voice will be silenced."

~Vincent Van Gogh


This tart is amazing. I mean it's the best thing I've put in my mouth in a long time.  It's simple, but done well. Many delicious ingredients conspiring on your behalf, bring you a tart bursting with fresh flavor. The pesto, homemade, full of fresh basil, spinach and garlic. The smell of which wafted through the house while cooking. Melty fresh mozzarella and fresh vegetables grilled in a grill pan on the stove really adds a smoky flavor. A fact I'm always surprised about when I use a grill pan indoors. The blistering of the tomatoes just enhances their sweetness. All sitting on  flaky puff pastry. I mean this tart is good.


Poking holes in the the puff pastry so it doesn't puff up too much.

The puff pastry is flaky and delicious.


I was so happy when I purchased this pre-sliced mozzarella! Having never used this before, I thought it would help save time, but when I saw how thick the slices were, (more for using in a Caprese Salad) I worried, until I bit into the yummy cheesy goodness.

Like I mention in the above caption, I thought what a great idea, already sliced mozzarella! Until I got it home and saw just how thick it was. Well, I did slice a few of the super thick pieces in half, but others I left that large. For me, the large mozzarella bites were the best since fresh mozzarella is a cheese I love. Even the thick pieces melt quite well.


Thinly sliced zucchini done on a mandoline. This can be also sliced thinly with a knife, or even diced small. Since you cook it before baking it on the tart, it has a chance to soften.


The thick pre-sliced mozzarella is a blessing or a curse, depending how you see it.


I used this as the sauce, it came from my freezer (I made it, then froze it. :)

I made the pesto a while back and froze it. Pesto freezes very well. You can use store bought if you'd like. Or even use tomato paste mixed with a little water and garlic. Or use olive tapanade! The options of your sauce element are endless. Just don't use something too liquidy. The puff pastry can't handle it and will turn soggy on you. 


Puff Pastry out of the oven ready to be topped


I'm lucky my husband doesn't like pesto. I got this baby all to myself. It reheats well in the oven the next day.


Meet Coco, our new pup


For those of you who follow my blog, I talked about the dog we took home on our last trip to Hood River, Oregon in my last brownie post. What I didn't mention in my post is how I practically begged to keep her to the previous owners. (I mean they had only had her for a week and a half, and who knows? It doesn't hurt to ask.) I let them know that she gets along with my dog so well they act like best friends. And that we love her so much. This dog just feels like family. I told them if they kept her we would totally understand and bring her back to them (a 3 hour ride one way, that's why it didn't happen sooner.) A few days passed, they called me and let me know WE CAN KEEP HER! YAY! I nearly jumped for joy. Such great news! She's proved to be a great and incredibly loving dog that we are so happy to call as family. Dreams really can come true.


Never miss a post! Like The Alchemist on Facebook!


Summer Vegetable Tart

adapted from the Garden Vegetable Tart from Better Homes and Gardens August,2012 Issue

Ingredients

1 frozen puff pastry sheet (half of a 17.3 oz. package.)

2 ears of fresh sweet corn, cooked already, perhaps from the night before - I didn't use all of the 2 ears, maybe 1 1/2

1 medium zucchini - thinly sliced lengthwise

1 pint cherry tomatoes - Surprisingly, I did use all of these

4 oz. thinly sliced fresh mozzarella (I probably used almost double this amount since my mozzarella was so thick, so the amount is to your taste. If you love lots of cheese, you're going to slice it a little thicker and use more, FYI.) Use enough sliced mozzarella to cover your tart.

Pesto - roughly 1/3 cup (79 ml.) - homemade or otherwise OR use 1/4 cup (59 ml.) tomato paste mixed with a little garlic, and thinned with a little water, OR use olive tapenade - I used homemade pesto like I previously mentioned

Fresh Basil - thinly sliced - (optional) - I would use this if you are NOT using pesto for the sauce. If you are using pesto, that's probably enough basil. I did not use extra basil, just wanted to mention it if you won't be using pesto.

Directions

Preheat the oven to 425 degrees Fahrenheit, 220 degrees Celsius, or Gas Mark 7.

Roll out the puff pastry on a lightly floured surface to a 14 inch by 10 inch rectangle. Transfer to a parchment paper lined cookie sheet. (If you don't have parchment paper, you don't need it, it just really helps transferring the tart back to a cutting surface when it's done.) Prick the pastry all over with a fork, and bake in the preheated oven for 10-12 minutes, until the center is set and the edges are lightly browned. Remove from the oven and press it down with a spatula if it's too puffed up.

Now for the veg. If your corn isn't cooked already, you can microwave it wrapped in wax paper for 2 or 3 minutes. Or you can steam it, in a large pan with a steam basket and a little water, till it's just getting soft. I always cook my corn in it's husk in the oven at about 400 degrees Fahrenheit, 200 degrees Celsius, Gas Mark 6, for about 40 minutes.

Lightly brush the zucchini slices, tomatoes and corn with a little olive oil and sprinkle on some salt. Prepare an indoor grill pan. ( I mean sure, you could grill the veg outdoors if that's how you roll.) Cook the vegetables on medium high heat till they are tender, a few minutes. I cut my cherry tomatoes in half and placed them on their backs, and cooked them just for a few minutes. The corn I had already cut off the husks so I didn't grill it, but next time I will, and the zucchini was so thin it just needed a minute or two. When that's done, set the vegetables aside. Cut the corn off the husks if you haven't already.

Spread your sauce (pesto, tomato paste mixture or olive tapenade) on the puff pastry. Add the mozzarella cheese, zucchini slices, corn, and tomatoes.

Bake 10-12 minutes, until the cheese has melted and the puff pastry is golden brown and delicious. Top with fresh basil (if using.)