Monday, February 28, 2011

Lemon Cream Pudding


"When life hands you melons, you know you're dyslexic."


I feel like the luckiest girl in the world. I have friends in California with the most amazing Meyer lemon tree.  This tree of theirs makes the sweetest juicy lemons I've ever had. When you cut into them they are spilling with juice. My sister and I are always raving about these gems, so I feel super fortunate to have in my possession a large bag of these babies. Thank you Charles and Michelle!


Think creme brulee, only lighter, and smoother, silkier. That's what this pudding is like. There are no eggs in this recipe, but the cream transforms into a perfect pudding texture.

It makes an elegant make ahead springtime dessert, fresh, bright and satisfying.

 It needs so little effort, it's almost embarrassing. Almost.

Meyer lemons are sweeter than traditional lemons. You can use one or the other in this recipe, I don't adjust the sugar either way because with Meyer lemons I just know to expect a sweeter end result.


Lemon Cream Pudding

This needs to be made at least 4 hours ahead, or overnight, so plan accordingly.

2 cups (500 ml) heavy cream
3/4 cup (192 g)  sugar
1/4 cup (60 ml) fresh lemon juice
2 tsp finely grated lemon zest-use a microplane, you need to get the zest very fine

In a medium size saucepan over medium high heat,  place cream and sugar, stir until dissolved. Bring to a boil stirring very frequently. You will need to be standing there monitoring it to make sure it doesn't boil over. Bring it to a boil and boil for 3 minutes, stirring constantly.

Remove from heat and add the lemon juice and zest. Stir and let it sit on the counter for 15-30 minutes. Stir it again, and pour it into ramekins, tea cups, martini glasses etc. Make sure the mixture is cool enough for the vessels you are pouring it into, for example you probably don't want to be pouring boiling hot liquid into a martini glass.

Refrigerate the puddings for 4-5 hours or overnight then serve cold. The pudding will firm up and set up, once cooled.

This makes about 5, 1/2 cup servings.

Sunday, February 27, 2011

Changes

I've been making changes to this blog, as you can probably tell. I'm trying to make it easier to read, as well as make other improvements. For example, I've added a printable button to the posts, to make it easy to print a recipe. More changes will be coming, but all for the better.

Thank you for your support in this process, and thanks for reading!

Friday, February 25, 2011

Passionfruit Bars with a Shortbread Crust


"This special feeling toward fruit, it's glory and abundance, is I would say universal... We respond to strawberry fields or cherry orchards with a delight that a cabbage patch or even an elegant vegetable garden cannot provoke."

-Jane Grigson


I have never eaten a passionfruit. Oh sure, I've had passionfruit tea, passionfruit liqueur, and lately I had a passionfruit cupcake while I was in Los Angeles. I love the flavor, but have never had one. Didn't even know what one looks like. A few days ago I was on a quest to find said passionfruit because I wanted to make something with it, anything. I searched for this tropical fruit, in places I was sure I would find success. A huge Asian grocery, a gourmet grocery store, nothing, not canned and certainly not fresh. Damn, I thought.

I came home and did some research. I found out I may have some luck at a Hispanic market, since they are popular in Columbia and Venezuela. So out I went. After striking out at a few Mexican markets, it happened, I found a market that not only sold Mexican goods, it was labeled, Hispanic market as well.

my passionfruit puree

The woman at the counter was busy, so I roamed the aisles looking for this elusive fruit. Canned fruit aisle, nothing. I thought while I was there I might as well look at other things. So while I was looking at the fresh Mexican cookies and candy I saw the freezer aisle and proceeded. Yes!! There it was. They had many exotic fruits I've never heard of in puree form, for smoothies, the label says.

I took home my puree and went to work. I made a cake that originally called for pineapple, switching out the passionfruit puree in it's place. I thought this is a fruit puree too, like crushed pineapple, what's the difference? Bad idea. Don't do this. I measured out the puree in a measuring cup, then I tasted it. (Thankfully) Wow. Did you know passionfruit is like, super tart? I mean like a lemon. I had no idea.


It was like I was from another planet and had never seen a lemon, but I had a piece of lemon cake and really enjoyed it, so I assumed that if I bit into a lemon it would taste like cake.

I added sugar (alot) to the puree and proceeded. The cake didn't work. It's a stronger flavor than pineapple, and it was too.. well, it had lots of problems.

I decided I needed to treat it for what it is, "it is what it is".. the most popular catchphrase of late. Anyway, I thought I needed to use a passionfruit recipe. Or use a lemon recipe but one that relied on juice for flavor, not zest. So that's where these bars came from. This is my favorite lemon bar recipe only with passionfruit puree replacing the juice.


The sky was really beautiful today. Can you believe we have snow in late February?

They are clearly passionfruit tasting, sweet and tart, with a browned butter shortbread crust. Really lovely. They did indeed satisfy my craving for passionfruit. I purchased quite a few of these, so my passionfruit escapades aren't over.


 My chickens looking for something to eat in the snow.


Passionfruit Squares With A Shortbread Crust


Ingredients

For Crust

1/2 cup (100 g) powdered sugar
1 1/2 cups (150 g) all purpose flour
12 Tablespoons (1 1/2 sticks) (172 g) unsalted butter at room temperature
pinch of salt

For filling

1/2 cup (50 g) all purpose flour
2 cups (383 g) sugar
1 cup plus 2 Tablespoons (264 ml) passionfruit pulp, or puree. I found it at a Hispanic market in the frozen section Make sure it's the tart yellow passionfruit, not the purple sweet variety
6 eggs
1 egg yolk
pinch of salt

For Topping

powdered sugar

Directions

Preheat oven to 350 degrees Fahrenheit, 180 degrees Celsius, or Gas Mark 4.

Grease a 9x13 pan and place a piece of parchment paper that hangs over the sides, to act as a sling. (as pictured above.) To lift them out easily after cooking. Then spray or grease the paper.

Make the crust. Add all of the crust ingredients to a bowl of an electric mixer and beat on low speed until it forms a dough. (This takes 3 or 4 minutes, be patient.)

When your dough is ready, press it into the pan. To get it into the corners evenly, use the bottom of a measuring cup to press it in, and up the sides by 1/2 inch or so. It should be 1/4 inch thick.

Line the crust with parchment or heavy duty foil and place pie weights (or dried beans) on top to weigh it down. Bake until it turns golden 30-40 minutes.

In the meantime, make the filling. Whisk together the flour and the sugar. Add the passionfruit puree, and stir. In a separate bowl whisk the eggs with the salt. Add the eggs to the passionfruit mixture and whisk until well blended.

When the crust is done, pour in the filling. Turn the oven down to 300 degrees Fahrenheit, 150 degrees Celsius, Gas Mark 2. Bake until the center is set, 35-40 minutes.

Cool on a wire rack, then refrigerate. When cold, lift the bars out with the parchment sling, dust with powdered sugar and cut into squares.

Saturday, February 19, 2011

Coconut Curry Vegetables with Coconut Rice


"I like rice. Rice is great if you're hungry and want 2,000 of something
."

-Mitch Hedberg

This post is part of a series, Healthy Vegetarian Mains


So the secret's out. I love coconut. Coconut milk, coconut oil, fresh coconut, shredded, whatever.

I can't stay away from the stuff. I've made Caribbean Coconut black beans and vegetables over rice, I've made Thai Pumpkin Soup (with coconut milk, of course) and now this Coconut Curry Vegetables with Coconut rice, a double whammy of coconut. Considering I haven't really posted many main dishes here, that's quite a lot of the stuff.
.

It's not such a bad thing to love. Coconut meat is full of fiber and vitamins, coconut water is popping up everywhere as an electrolyte filled drink, and coconut oil has a ton on nutritional benefits.


This is a dish I make often. It's super fast, easy to make, and versatile. Sometimes I make it with only vegetables, and sometimes I include shrimp. It would also be tasty with chicken added.


This dish is full of flavor. I use a mild curry powder, but you could use a spicier version. I also use just a pinch of crushed red pepper, but you could use more. I'm not so good with the spicy food, but if you like things hot and spicy, it's perfect served with this creamy, and mild coconut rice.

I like to make rice in the oven. I have an electric stove I don't always get along with, so by cooking it in the oven prevents any scorching on the bottom of my pan, me worrying if the heat is low enough, and wondering when it's done. Plus, it's a no brainer. Put it in for a half an hour, take it out, let it sit for a few minutes, done. Not a scorched pan in sight. Only perfect, fluffy, delicious rice.
Of course you don't need to make coconut rice, you could use water instead of the coconut milk. The coconut milk adds just a slight coconut flavor, and a rich and creaminess that I'm in love with. If you want to boost the coconut flavor of the rice, then add the optional toasted unsweetened shredded coconut. Make sure to buy light coconut milk for the rice, using the regular variety makes the rice too heavy, and slightly greasy.
.


deer in our field I caught hanging out today

.

Coconut Curry Vegetables With Coconut Rice


Ingredients for vegetables


2 Tablespoons olive oil, or other neutral oil

one onion sliced, I used a white onion

one bell pepper, I used a half of a red one, and half of a yellow one this time, sliced thinly

2 cups (300 g) sugar snap peas (I used the kind in a bag ready to use)

2 cups (300 g) assorted stir fry vegetables (I used the kind from a bag, already cut up)

2 cloves garlic, minced

2 tsp ground cumin

1 tsp ground coriander

1 tsp curry powder (I used mild)

1 Tablespoon sugar

pinch of crushed red pepper, or up to 1/4 or 1/2 tsp if you like things spicy (if you aren't very familiar with this, add it gradually, it can get hot fast.)

1 cup (236 ml)  light coconut milk from a can (a 13.5 oz can is 2 cups) freeze the rest in a ziplock bag for another use, if desired

2 Tablespoons (30 ml) fresh lime juice

1 Tablespoon cornstarch

1 Tablespoon (15 ml) cold water

2 Tablespoons chopped fresh cilantro-optional

salt to taste


Ingredients for rice

1 cup (8 oz) (210 g) rice- I used Jasmine, any type would work, if you use brown rice it may need to cook a little longer

2 cups (473 ml) light coconut milk- (one 13.5 oz can is about 2 cups)

3/4 tsp salt

1/2 cup (38 g) unsweetened shredded coconut-you can find this at health food stores-toasted lightly-(optional)

Directions

Preheat the oven to 350 degrees Fahrenheit, or 180 Celsius. Rinse the rice well in a fine mesh strainer under cold water. Place the rice in a covered oven safe dish, or a covered pan safe for the oven. Heat the coconut milk in a pan or in the microwave. When the coconut milk is at a simmer add it to the rice with the salt.

Place the covered rice in the oven for 30 minutes. While this is cooking make the vegetables.


Get your mise en place ready. Get your cut vegetables ready to use next to the stove. (Once you start cooking this, it goes fast.) Get your garlic minced and ready to go, and measure out the spices in a little bowl. In another small bowl, mix the cornstarch and tablespoon of water to make a cornstarch slurry, set aside.


In a large skillet over medium high heat, add the oil to your pan and start cooking the onion, bell pepper and sugar snap peas, (and any other vegetables you might be using that take a while to cook) add a pinch or two of salt, and cook until the vegetables begin to soften, about 3 minutes. Add the garlic and cook 30 seconds more.

.

Add your spices, the cumin, coriander, curry powder and red pepper flakes. Cook for 1 minute. Add the 1 cup coconut milk and sugar. Bring to a boil. Add the other quick cooking vegetables you may be using, in my case it was the stir fry vegetables, which were kale and other very small cut veg, so they didn't take very long to cook.

Cook for 2-3 minutes until vegetables are to your desired tenderness. Add the lime juice. Get your cornstarch slurry, stir it first, then add it to the pot. Stir it all together and bring to a boil. When the sauce has thickened it's done. Taste it and see if it needs salt, if it does, add it. Keep it warm until the rice is done.
.

After the rice has cooked for 30 minutes, let it sit on the counter for 10 minutes. Then add the toasted coconut (if using) and stir together to distribute. .

Serve the vegetables and sauce with the coconut rice. Top individual portions with the chopped cilantro. (if using.)

This dish serves 3, or 2 pretty large portions, if you are serving 4 adults, I'd double this.

Options
.

Shrimp
.
If you want to make Coconut Curry Shrimp, substitute one pound of raw shrimp for the 2 cups of stir fry vegetables. Add them when you would add the quick cooking vegetables. Or use cooked shrimp and add it last, just stir it to get it hot.


Chicken
.

If you want to make Coconut Curry Chicken, substitute 2 cups cooked chicken in strips or cubes, for the stir fry vegetables and add it at the end, stirring it to warm it in the sauce.


Monday, February 14, 2011

Banana Breakfast Cookies


"Love is the strongest force the world possesses, and yet it is the humblest imaginable."
.
-Mahatma Gandhi


Today is Valentines Day! I sincerely hope all of you are as lucky as I am on this day where all is focused on love, hearts, flowers, chocolates and romance. My husband brought me home some gorgeous roses in addition to taking me shopping a few days ago for a few things I had my eye on. I told him, "if you buy me all of this, it can be your Valentines day present for me?" I didn't expect the flowers too. So I got double the gifts this year, score! Of course it's not all about the presents. I'm also happy to say I have a wonderful husband and am very happy with him all around, (98% of the time.)


I used to bake for a local coffee shop, and these banana breakfast cookies were one of the best sellers. They're essentially oats, fruit, nuts and seeds, all wrapped up in a cookie. They were popular with customers who liked to eat healthy. These can also be made gluten free if you use gluten free oats.
.
They make for a perfect grab and go breakfast. The cookies can also be individually wrapped and frozen, so you can bake up a whole bunch of them and only do the work once, for days of healthy breakfasts.


They're pretty flexible too. I usually add honey or maple syrup to them because I like things on the sweet side. But if you don't, you don't need to at all, the bananas and dried fruit can provide enough sweetness. I make mine with dates, walnuts and sunflower seeds, or pumpkin seeds, but you can use any dried fruit and nut you like. Raisins or dried apricots with almonds or pecans would be lovely as well.


the roses in the background are the ones I got for Valentine's day


Never miss a post! Follow The Alchemist on Facebook! Or Pinterest!


Banana Breakfast Cookies

this recipe makes only 8 large cookies, (ice cream scoop size) but it can easily be doubled

Ingredients
4 large very ripe bananas (previously frozen is fine, just thaw them first)
2 cups oats-old fashioned or quick,(but not instant)- ground into a fine powder in a blender (I used a Vita Mix) - if you are gluten free, make sure they are gluten free oats
1 tsp baking soda
1 tsp cinnamon
1/2 tsp salt
2 tsp vanilla
1/2 cup honey or maple syrup-optional depending on the level of sweetness you desire
1/2 cup chopped walnuts-or any chopped nuts- (make sure they are unsalted)
1/2 cup chopped dates-or other dried fruit
1/2 cup sunflower seeds-or pumpkin seeds- (again, unsalted)
more oats, not ground, if needed about 1/2 cup
.
Directions
.
Preheat the oven to 350 degrees Fahrenheit, (160 degrees Celsius)
.
In a large bowl mix together the dry ingredients, the ground oats, the baking soda, salt and cinnamon.
Using the same blender you used to grind the oats, puree the bananas. (you can also just mash the bananas, either way works well.) Add the mashed or pureed bananas, the vanilla and the honey or maple syrup (if you are using it.) Mix it all together.
.
Add most of the nuts, dates (or other dried fruit) and seeds, reserving some to place on the tops of the cookies before baking, if desired. (This isn't necessary, it just highlights the ingredients, which is nice if someone beside you is eating them, they will be able to see what's inside.)
.
Now check the consistency of the batter/dough. If you used the honey, or maple syrup, you will probably need to add more oats (not ground) about 1/2 cup. (Also if you pureed the bananas, your dough will be more wet) You want it to be the consistency of soft cookie dough, not too stiff. You want to be able to scoop it onto cookie sheets and have it not spread out.
.
Scoop the cookie dough onto cookie sheets lined with parchment or a Silpat liner, using an ice cream scoop.
.
Bake for 14-18 minutes, or until done in the middle. Store in an airtight container when cool. Wrap them individually with Saran wrap and place in a Zip top bag in the freezer if you wish. They will keep in the freezer for months.

Sunday, February 13, 2011

Super Moist Red Velvet Cupcakes


"You know you're in love when you can't fall asleep because reality is finally better than your dreams."

-Theodore Seuss Geisel
- better known as Dr. Seuss, American writer and cartoonist


Happy Valentines Day! I decided to make these red velvet cupcakes for my husband and his co workers. The people he works with, love red velvet cupcakes. I make them often, mostly for other people. I've made so many different recipes of them, trying to get them moist enough (I like my cake really moist.) I also have a problem with them not having enough flavor. Of course they're not supposed to really taste like chocolate, it's supposed to be a buttermilk cake with a slight cocoa flavor. These have a wonderful flavor, perhaps with a tad more cocoa than most red velvet cakes, and they are extraordinarily moist.

Success! I say.


I topped these with some crumbs and some marshmallow fondant flowers I had made for another project.


I buy cupcake wrappers at a restaurant supply store, they come in a package of 500, but they are much, much cheaper than at the grocery store, and I don't have to remember to buy them every time I make cupcakes.


I add the red with the tip of a knife until I get it the color I want. It takes almost 1/2 a jar to get it this red.


I use Wilton's "no taste red" it's called that because some red flavors have a bitter taste. It takes quite a bit to turn the whole batch red. This is a paste color, another good brand of paste color is Americolor. Paste is more concentrated than the liquid you buy at the grocery store.

I used Penzey's high fat cocoa. This was a Christmas present from my sister. Last time we were at the Penzey's store she bought some and told me how good it was. Of course I wanted some too!


More Awesome Cupcake Recipes

The Best Moist Chocolate Cupcake Recipe- These cupcakes are super moist and light and fluffy the same time, I've been making these cupcakes to rave reviews for years and just got around to posting the recipe now!  Topped with silky chocolate buttercream

Pink Velvet Cupcakes - Very moist strawberry cupcakes topped with whipped white chocolate ganache

Apple Cupcakes with Caramel Buttercream - These are also super moist and super delicious!

Irish Coffee Cupcakes - These are so delicious and taste like coffee topped with whiskey spiked whipped cream.

My Favorite White Cupcakes - These are VERY moist and super delicious.


Never miss a post! Like The Alchemist on Facebook! Or follow on  pinterest!


Super Moist Red Velvet Cupcakes with Cream Cheese Frosting

an original recipe by me Melissa, aka The Alchemist
makes about 32 cupcakes

Ingredients

3 cups (450 g.) all purpose flour

1 1/2 tsp baking soda

1 tsp salt

1/4 cup (25 g.) cocoa

2 1/2 cups (515 g.) sugar

1 cup (236 ml.) vegetable oil or another type of neutral oil

1 cup (225 g.) butter, melted

4 eggs

1 1/2 cups (354 ml.) buttermilk well shaken, (or add a tablespoon of vinegar to regular milk and let sit for a few minutes) Or use 1/2 yogurt and half soured milk. (that's what I did this time, but I've also used only soured milk)

1 Tablespoon vinegar, white or cider

2 Tablespoons vanilla extract

red paste food coloring-use enough to get it as red as you want it. I use almost a half a jar.
Or if you only have access to the liquid color in the grocery store, you will need a whole (1 oz.) bottle.

Directions

Preheat oven to 325 degrees Fahrenheit, 160 degrees Celsius, or Gas Mark 3. In a large bowl, whisk together the flour, baking soda, salt, and cocoa.

Beat together the sugar, melted butter and oil until smooth, about 3 minutes in an stand mixer. Or you can use a hand mixer.

Add the eggs one at a time and mix well after each addition. Add the vinegar and the vanilla.

Add half the dry ingredients and mix well, then add half of the buttermilk and/or yogurt if you are using it.

Add the rest of the dry ingredients and mix well, then add the rest of the buttermilk/yogurt.

Add the color. If using the paste, add quite a bit, then stir and see if it's dark enough. Add more color to get it really red if it needs it. I use almost 1/2 a jar of the Wilton paste. If you are using the liquid, add the whole (1 oz.) bottle of liquid and mix well.

Scoop the batter with an ice cream scoop into muffin cups lined with cupcake liners, **edited to add** these cupcakes can be a bit greasy on the bottom, if you don't want that, then bake them in greaseproof or foil cupcake liners.** about 3/4 of the way full. The batter is quite liquidy, so alternately you can use a measuring cup with a spout and pour the batter in the cups that way, if you prefer.

Bake the cupcakes for 25-32 minutes. They're done when they pass a toothpick test .
When cool, frost the cupcakes with the cream cheese frosting recipe below. Top with crumbs if you like. It took me 2 cupcakes of crumbs to cover 30 cupcakes. (the recipe made 32.)

Cream Cheese Frosting

2, 8 oz packages cream cheese, room temperature
2 sticks (1 cup) (225 g.) unsalted butter, room temperature
2 Tablespoons Vanilla extract
pinch of salt
5-7 cups (625 g. to 875 g.) powdered sugar, or more

Beat the cream cheese and the butter together with a stand mixer or an electric hand mixer.

Beat it well until very creamy, about 4 minutes. Add the vanilla, 5 cups (625 g.) of sugar and a pinch of salt. Beat well until very fluffy, another 3 minutes or so.

Now check the consistency of the frosting. If you are going to pipe it, you may want it a little stiffer. I used exactly 5 cups (625 g.) and I was just able to pipe it. If you like a stiffer frosting, go ahead and add more powdered sugar to get it the way you like it. For this particular recipe, adding more powdered sugar is the only way to give it more body.

Saturday, February 12, 2011

Lemon Ricotta Cookies

"Oh, innocent victims of cupid, remember this terse little verse: To let a fool kiss you is stupid, to let a kiss fool you is worse."
.
-Edgar Yipsel Harburg, American song lyricist
.
Valentines day is just a few days away. I think it's a sweet little holiday. Candy, treats, and pretty little heart shaped everything abound. Pink is my favorite color, and I love everything pretty, so it's fun for me. Plus who doesn't like getting presents from their significant other?


These cookies aren't pink or very Valentine's day looking but I assure you, if your significant other enjoys lemon in any way, they will LOVE these cookies. I just yelled the word love, not something I do often, yell on the Internet, so you can tell I mean it.

You could also dress them up a bit to make them look Valentines day-ish by sprinkling some pink or red Valentines day sprinkles on the final product, if that's what you are going for.
.
My sister has been making these lemon ricotta cookies for years, she's the one who turned me onto them, which was also years ago. They remain one of my very favorite cookies of all time.
They are a moist, delightful little cake, more so than a cookie. Bright with lemon flavor.

My sister found the recipe on what used to be Recipezaar which is now Food.com. It's only recently I found out the original recipe came from Giada De Laurentiis. Thank you Giada for an amazing lemon cookie recipe!


With Spring around the corner, these lemon cookies would be a great addition to any Easter celebration. Or make them for your Valentine, they will love you for it!


Lemon Ricotta Cookies 

recipe adapted from Giada De Laurentiis at Food Network
.

Ingredients
.
for the cookies

2 3/4 cups all purpose flour
1 tsp baking powder
1 tsp salt
1 stick, 1/2 cup unsalted butter, softened
2 cups sugar
2 eggs
1 - 15 oz container of whole milk ricotta cheese or make your own
3 Tablespoons fresh lemon juice
the zest of two lemons
2 tsp. pure lemon extract, OR 10-15 drops of pure lemon essential oil (make sure it's food grade) (both of these ingredients are optional, but they do help boost the lemon flavor of the cookie.)
.
Glaze
.
5 cups powdered sugar
9 Tablespoons fresh lemon juice
zest of two lemons


Directions 
.
 In a large bowl whisk together the flour, baking powder and salt, set aside.

In a large bowl cream together the butter and sugar till light and fluffy using an elecrtic mixer, or do it in a standing mixer, (about 3 minutes.) Add the eggs one at a time, mixing until incorporated. Add the ricotta cheese, lemon juice, lemon zest and extract or essential oil (if using.) Beat to combine, add the dry ingredients and beat just until blended.

Refrigerate dough covered for 2 hours.

Preheat the oven to 375 degrees Fahenheit, (190 in Celsius.)

Line 2 baking sheets with parchment paper or use a Silpat liner.

Using a cookie scoop (mine measured 1 1/2 tablespoon size) or a spoon, drop the dough onto cookie sheets. Dough will be sticky. Gently pat the mounds down slightly so they don't bake in a dome shape. They don't spread out very much. Bake for 12 minutes in the preheated oven. Let the cookies cool on the cookie sheet for 10 minutes then transfer to wire racks to cool completely.

While the cookies are cooling down, make the glaze by combining all of the ingredients in a bowl and stir until it becomes a glaze, if it seems too thick add a little more lemon juice, or too thin, add more sugar. But you do want the glaze to be quite thick so you can get a nice thick coat.

When cookies are completely cool glaze the cookies. Place cookies on a wire rack with a cookie sheet underneath to catch the glaze drips. Dip the tops of the cookies into the glaze, or spread the glaze onto the cookies. I prefer to dip them, but make sure the glaze covers the entire top of cookie.

Let the glaze set on the cookies and dry for at least 2 hours.

Store cookies in an airtight container. These only last a few days. They are best eaten the day of being made or the next day.


This recipe makes about 35 cookies.

Thursday, February 10, 2011

Instant Tamale Pie

" A way to a man's heart is through his stomach, that shit true as gold. You put some love in your food and a fool can taste it."
.
-Raelle Tucker, True Blood, Cold Ground 2008
.
This recipe is part of a series, Healthy Vegetarian Mains
.


This isn't the tamale pie that I grew up eating. It's something completely different. It doesn't really remind me of tamales either, so I feel the title is deceiving. It's a lovely dish, and I do love corn and beans together. I was drawn to this recipe because of it's ease, (and I thought it would taste good of course.). I thought if that tastes as good as it sounds, it's something I can keep the ingredients around to throw together and have dinner in a flash.
.
The original recipe comes from the Moosewood restaurant's "New Classics." (I made a few small changes) in the description it reads, "When you suddenly think 'we need food, pronto!' Try this immensely easy and gratifying meal. With it's ready made polenta, it's prepared in only 15 minutes."
.
A true statement indeed.
.
Instant Tamale Pie
serves 4
adapted from the Moosewood Restaurant's "New Classics"
Ingredients
1 3/4 cup pinto beans with Mexican seasonings, with juice, 1, 15 oz can
1 cup frozen corn
1/2 cup salsa, (I used Pace mild, you can use what you like)
1 tsp ground Cumin
1/2 tsp dried Oregano
one whole roll 18 oz. prepared Polenta, plain, or one with Mexican spices
2-3 tablespoons fresh cilantro, chopped (optional)
1 cup queso fresco (or use grated cheddar if you wish, or any cheese, jack would be good, or pepper jack if that's how you roll)
Instructions
Preheat oven to 350. In a large bowl, add the beans (with the juice) and mash a little with a potato masher. Add the corn, salsa, cumin and oregano and mix. Set aside.
Slice the polenta into 1/2 inch slices and place in a greased 9 inch square baking dish, or a pie plate would work. Pour the bean mixture over the polenta. If you are using a shredded cheese add that now. (I added my cheese at the end because I used queso fresco.)
Bake for 30 minutes. If you are using the queso fresco add it now with the chopped cilantro. If you already added your cheese, top it with your cilantro and you're done!

Sunday, February 6, 2011

Make Your Own Yogurt (without a yogurt machine)


"For the millions of us who live glued to computer keyboards at work and TV monitors at home, food may be more than entertainment. It may be the only sensual experience left."

-Barbara Ehrenreich, author, social critic

This post is to accompany my talk on BTO for Monday, January 31, 2011.


In India to make yogurt, at the end of the day you pour fresh milk into the wooden bowl that held the yogurt from yesterday. The small amount of left over yogurt provides the active cultures to multiply overnight and along with the natural heat of the atmosphere that bowl of milk in the morning is magically, yogurt.


Here in America where the conditions might not be as perfect for yogurt making, we have yogurt machines. I didn't want to do it that way this time, although I do own a yogurt machine.

When I decided to do a show on making cheese, I wanted to cover how to make yogurt as well. I've heard of dozens of ways to do it, so I set forth to learn about some of those ways. I wanted to learn of simple, easy ways that would make home cooks be inspired to do it themselves in a way that worked with their lifestyle and used supplies they already had. Yogurt makers are great, of course, and a reliable way to make yogurt, but not everyone has the space or the desire to add another appliance to their already full, kitchen.


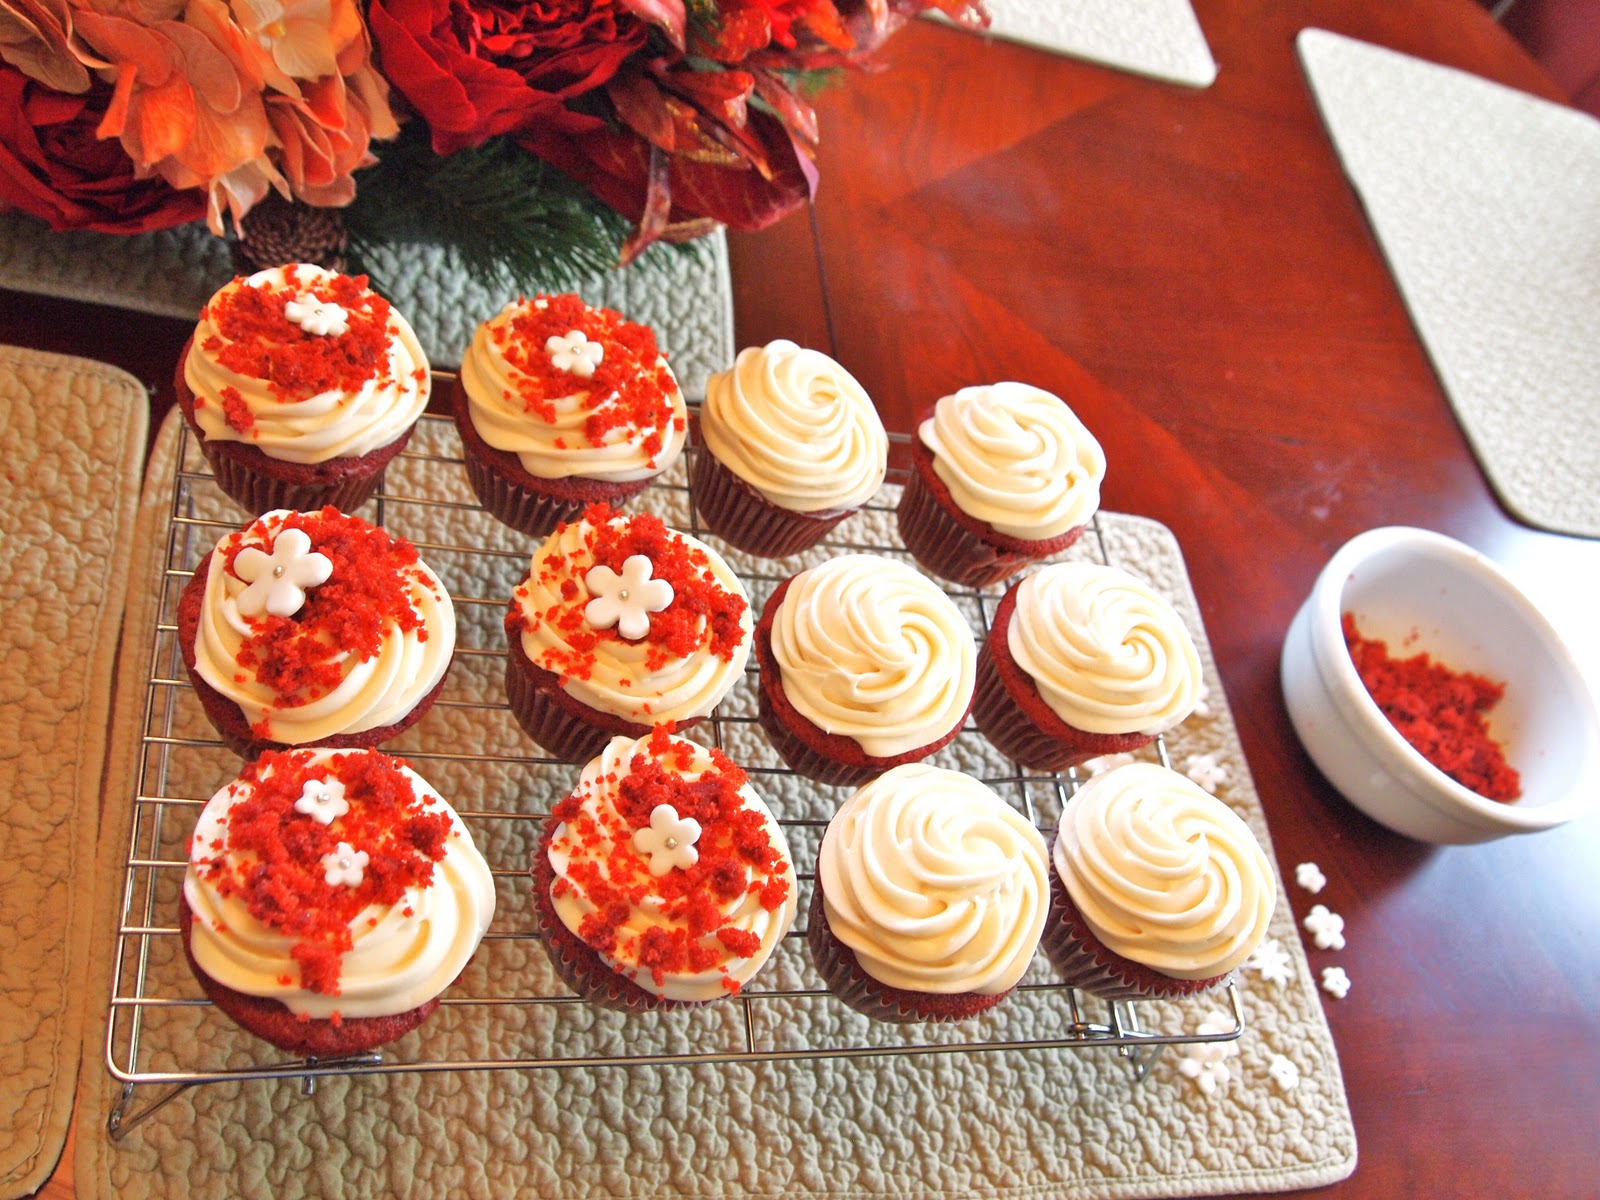
 yogurt mixed with homemade peach jam


I ended up using a crockpot for the incubation stage. It worked wonderfully. I've listed in the recipe below a bunch of different ways you can incubate it.


There are many benefits to making yogurt yourself. One is cost. The ingredients are milk and a little yogurt for a starter. The good news is you can portion out that container of yogurt into 2 Tablespoon size portions and freeze them for using next time. So here's how that goes. Make your first batch. Save some yogurt from the 1st batch for the 2nd batch. You can do that about 5 times. Then for the 6th batch, you go for your 2nd portion of store bought yogurt in the freezer. This makes that first store bought yogurt go pretty far. If you purchase milk for your family anyway, you may be buying milk in large quantities which would make the cost savings even more substantial.


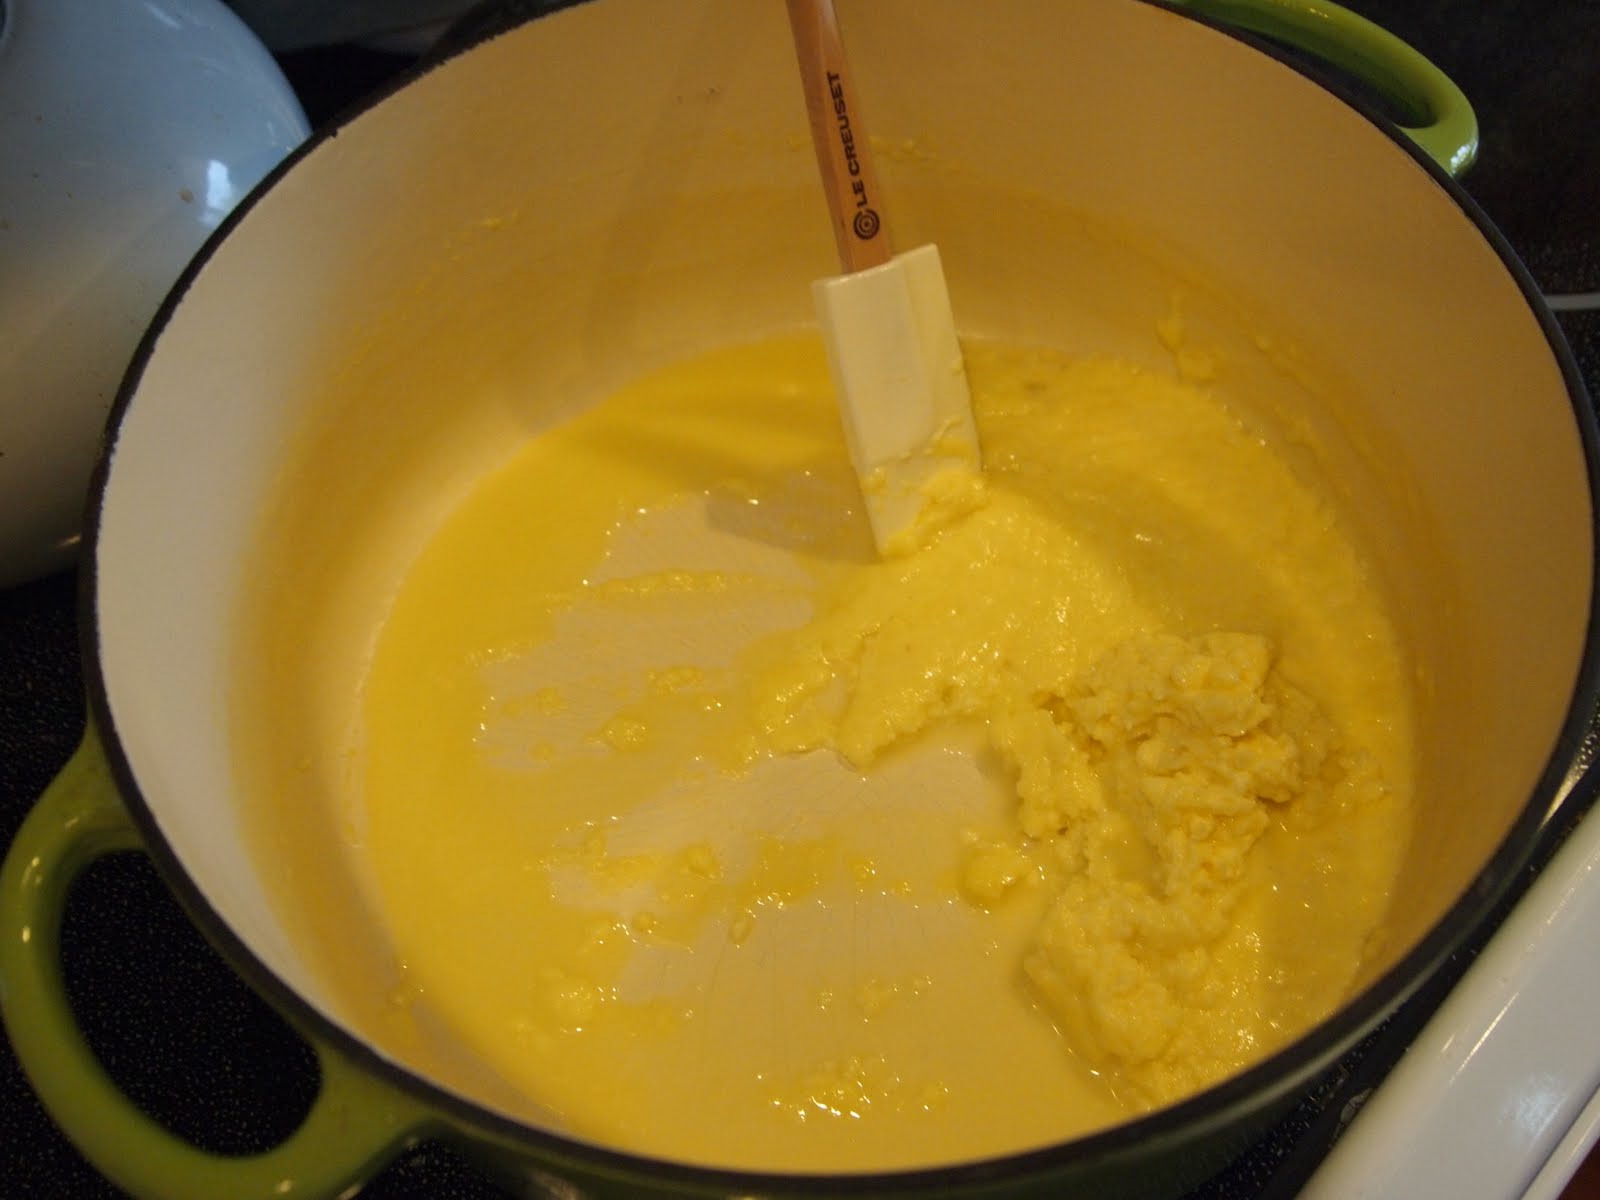
I used a make shift double boiler to heat the milk


Of course another benefit that goes for anything you make yourself is that you know what goes in it. You can add your own fresh fruit, sweetener, flavorings, the limits are endless to what you can do with plain yogurt. You can even control the thickness of it. You can drain it to make Greek yogurt, or make a thick yogurt that acts like sour cream. Drain it even longer and make yogurt cheese, a good alternative to cream cheese, which you can later add fruit, or herbs and use as a spread.


I used raw milk from Cozy Valley Creamery, a local dairy farm

Making yogurt is also pretty easy. And like anything, once you do it you get better at it, and you get a feeling for how you prefer it. You can make it tangier by letting it incubate longer, for example. I like to do it overnight, so there's just a little work before bed, then I let it incubate all night.


I wrapped a crockpot in towels to keep the warmth in

Homemade Yogurt

.

Ingredients
.
4 cups milk or 1 quart- I used whole raw milk, 2% may be used, or even nonfat. If you use nonfat you may want to add the dry milk to help make it thicker. Goats or sheep's milk may also be used.


1/4 to 1/2 cup dry milk- (optional) this is to help thicken it. If you are using nonfat milk I would use it.

.
2 Tablespoons store bought plain yogurt- Make sure it has live active cultures in it. Also choose one that has the farthest away expiration date (you can also use freeze dried yogurt cultures that is sold at health food stores)
.

Directions
.

Put your yogurt on the counter to bring it to room temperature while you do everything else.


Heat the milk to 185 degrees Fahrenheit, or 85 degrees Celsius. I used a make shift double boiler to do this. If you don't use a double boiler make sure you heat it very slowly on medium to low heat, otherwise the milk will stick to the bottom of the pot and burn. So as you are heating the milk, stir it frequently. Also if the heat is too high the milk will boil over, and make quite a mess.

If you don't have a thermometer this is the temperature of a low simmer. It is also the temperature that milk starts to froth.
.

*Alternately, the milk may also be heated in the microwave. I'd use medium power. If you are doing this, you can go ahead and keep it at a low power and simmer it for 10 minutes as advised in the next step.

.

Keep the milk simmering on the stove at 185 degrees Fahrenheit (85 Celsius) for 10 minutes. This is done to cause the setting matrix to be formed, and keeping it at this temperature for 10 minutes will give you the best results.

.

Cool the milk to 110 degrees Fahrenheit. (43 degrees Celsius.) Do this using a water bath (a bowl of ice water under your bowl of milk) or just let it sit on the counter for a half an hour or more checking on it periodically, stirring frequently. If will feel warm to the touch, but not hot.

.

When it gets to 110, stir in the 2 tablespoons yogurt and the dry milk (if using.)

.

Pour the yogurt into whatever container(s) that will work best for the incubation method you are using. See below. I didn't need another container because I used my crockpot.

.

Keep the yogurt at about 110-100 degrees Fahrenheit (43-37 degrees Celsius) for 7 hours minimum. If you prefer your yogurt more tangy go longer, up to about 12 hours. Also keep it still. Don't move it around too much or stir it at all until it's done.

.

Different Incubation methods (whatever works for keeping your yogurt at 100-110 degrees Fahrenheit, 43-37 Celsius, for 7-12 hours.) Using a thermometer once in a while to check the temperature is a good idea, if it's your first time using a particular method.

.

-yogurt machine-duh. if you have one you probably already know how to make yogurt.

.

- crockpot- This is what I used this time. I turned my crockpot to warm, poured in the milk/yogurt mixture, then kept an eye on the temperature for a half an hour or so. It was a consistent 110 for a while, so I turned it off and wrapped it in towels. Half way through I turned it on warm again for a half an hour, then turned it off again. I got this idea from Stephanie from A Year in Slowcooking. She makes hers entirely in the crockpot though.

.

-top of stove- Pour the milk/yogurt into jars, place them in a large pot of warm water with a lid. Keep the water warm by heating it periodically if it gets cold. If your kitchen is hot, you may not need to.

.

-oven- pour the milk/yogurt mixture into jars and place the jars in a vessel with warm water. If you have a gas oven keeping the pilot light on may be enough heat to keep it at 100 degrees. If not, you may turn on the oven let it heat up a bit, then shut it off. Later you can turn it on again and then shut it off. If you do this, be careful not to heat the oven too much. Keep a thermometer in the water to check the temperature once in a while.

.

-cooler/ice chest- place the yogurt/milk mixture in jars placed in warm water in a cooler (the kind you keep soda in for a picnic.) If the water cools down too much add warm water again later.

.

-thermos- Place your yogurt/milk mixture in a thermos. Place it in a warm spot. Near a heat source, or I read of someone placing the thermos between the wall and the refrigerator, because the refrigerator produces some heat. Or if you don't have a heat source, wrap it in towels to preserve the heat.

.

-warming tray- pour the milk/yogurt into jars then place the jars inside a vessel filled with water then place the vessel (covered) on the warming tray. I think I'm going to try this next time. I have a few of these I use during Thanksgiving to keep food warm. (I love them.)

.

- aquarium heater- put the heater in a bucket of water, pour the milk/yogurt in jars and place the jars in the water. Make sure it doesn't have an auto shut off.

.

-warm blankets- Pour the milk/yogurt into a large covered vessel, wrap it in an electric blanket. Make sure it can be programed to not shut off automatically.

.

-sun-pour the milk/yogurt in jars and cover. Place in the sun on a hot day, or on a window sill.

.

-wood stove- pour yogurt/milk in jars and place on the back of the cooling wood stove. Don't do it while it's on, obviously. Only if it was on, then turned off for the night.

.

-heating pad- fill jars with yogurt/milk mixture then place on a towel covered heating pad. Also cover the jars with towels to keep the heat in. This can only be done with a heating pad that doesn't shut off automatically after 15 minutes. (mine does) Unless you want to keep turning it back on.

.

Use your imagination! I'm sure there are many other ways that have not been mentioned here. I would like to hear them if you have another way you've been doing it, please let me know in the comments. It's kind of fun learning all of these different ways to make yogurt!

.

After 8-12 hours have passed, you will have your yogurt. It will probably have some greenish liquid on it. This is the whey. It is highly nutritious. I spoke about it in my making Ricotta Cheese post. You can either stir it in the yogurt or drain it off. I like my yogurt on the thicker side, so I strain it to get it to the consistency I like, by placing a cheesecloth lined fine mesh strainer over a bowl to catch the whey for about an hour or so. Commercial yogurt has added thickeners in it, so our homemade yogurt is going to be naturally not as thick, unless you strain it.

.

Refrigerate the yogurt. It will get thicker as it sits in the refrigerator.

.

Flavor the yogurt by adding in fruit, jam, maple syrup or whatever your heart desires.
.

Some great links on making yogurt


Saturday, February 5, 2011

Make Your Own Homemade Ricotta Cheese

ricotta cheese with bananas, honey and almonds
.
"I have never met a man so ignorant that I couldn't learn something from him."
-Galileo Galilei
.
This post is to accompany my talk on BTO for Monday January 31st 2011.
.
I've been reading about making your own ricotta for years, I'm so glad I finally did it! It's so easy, I mean really, really easy. I want to thank BTO listener (and reader of this blog), Jen, for suggesting I do a show on cheesemaking. For my next show I'm going to research making other cheeses that are easy to make at home, such as cottage cheese, and mascarpone cheese. I look forward to expanding my cheesemaking horizons, and becoming an amateur cheesemaker!
.
ricotta with the whey draining from it

When we make ricotta cheese at home it's not really true ricotta cheese. Ricotta, translated means, "cooked again". It is traditionally made with the whey left over from making other cheeses. Since whey isn't readily available to home cooks, (you will have some left over if you make yogurt, or if you make mozzarella cheese at home, you'd have the whey left from that. For us that don't make cheese at home, milk is used instead. What we have instead of true ricotta, is fresh cheese, such as paneer, queso fresco, or farmer cheese.

Speaking of milk, raw milk will produce the best tasting ricotta. If you use regular milk the taste won't be as pronounced, it may be bland. A small amount of salt is added in the end to enhance the flavor, which does help. Goat's or Sheep's milk can also be used instead of cow's milk.
If you often wind up with leftover milk, this is a great way to use it. I know of someone who buys 2 gallons of milk from Costco regularly, sometimes it got used, sometimes not. So when she was left with a gallon or half a gallon of milk, a few days before it expired she would make ricotta. You could also make yogurt.
.
The instructions are really simple, first you heat the milk (slowly), then you add an acid to separate the curds from the whey. I used lemon juice, vinegar can also be used. Some people use buttermilk, or even yogurt as a separating agent, but I spoke to someone who has used yogurt, and they mentioned that you can taste the yogurt in the final product.

The curds will be your ricotta, and the whey that's left is highly nutritious. Whey is a complete protein that contains all of the essential amino acids needed by the body. Using it when making bread, or when soaking dry beans makes the bread or the beans, more digestible. If your whey looks greenish, don't worry, that's the riboflavin or vitamin B2.

the curds seperating from the whey


Homemade Fresh Ricotta Cheese
this recipe makes about 2 1/2-3 cups ricotta


Ingredients8 cups fresh whole milk, raw milk is best, but you can also use homogenized. Goat milk or sheeps milk works also

3 1/2 tablespoons fresh lemon juice, or vinegar

a cup or so of cream, or milk (optional) for adding in later
salt

DirectionsGently heat the milk over medium heat. Or use a double boiler, (a bowl placed over simmering water) make sure you do this slowly. If you heat it over too high a heat, the milk will burn the bottom of your pot, and also milk loves to boil over on the stove.

Heat the milk until it reaches a simmer. This will take on medium heat about 20 or 30 minutes. Or until it reaches a temperature of 190 degrees Fahrenheit (90 degrees Celsius.)

When the milk comes to temperature, remove the pot from the stove and stir in the lemon juice, (or vinegar). Add it, then stir gently, only to distribute the acid. Then stop stirring and let it sit for 5-10 minutes. The curds will have separated from the whey. Gently pour this mixture over a fine mesh sieve covered with cheesecloth sitting over a bowl to catch the whey.

Let it drain for just a minute or two. You will know at this point how dry the ricotta looks, or how moist it is. Mine got dry fast. I wanted it to be quite moist, so I stirred in some cream to get it to the consistency I wanted it. You could also stir in some of the whey to reach the desired consistency, or milk, your choice. Stir in a few pinches of salt, to taste. Store in the refrigerator.

This keeps in the fridge just for 3 or 4 days.